Tomatoes were and will always be one of our most valuable assets on the garden, and sometime we invest so much in it that we forgot about the other plants, and then we just say can I benefit my plants with the surplus that I have from tomato fertilizer, after all plants are somehow all similar and have common requirements, so the question is Can you use tomato fertilizer for other plants ?
The answer will be :
Yes why not, most tomatoes liquid fertilizers or granules are made of nitrogen, phosphorus and potassium as primary nutrients and these are the main requirements for almost all the plants, of course they might need different doses depending on their built. follow our step by step to know if it is totally beneficial to add tomato fertilizer for your plants
First of all, see what does your fertilizer contain:
if you are using any type of fertilization that is manufactured you can actually see the component of the fertilizer with the doses that they come with.
Since you have a tomato fertilizer: you can see the NPK doses that are the main focus ors each in google with the name of the product if it happened that you couldn’t find that information, some products have other nutrients included like calcium magnesium … and those nutrients help the plant face some diseases and grow strong. you can see all the nutrients that tomatoes needs for different stages in this article
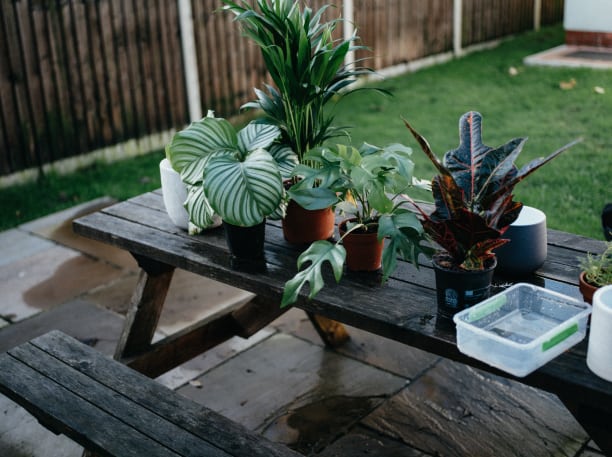
Second, read about your plant:
To see what does the plant needs and its nutrients requirements generally all the plants have 3 major parts of nutrients that they need to take from the soil and those are : primary (NPK) in large quantities , secondary (Calcium, magnesium and sulfur) in medium quantities and finally micronutrient (iron, boron, manganese…) in small quantities.
you can provide those nutrients by constantly working your soil and adding good quality compost that has a diverse mix of nutrients, of if you planted heavy feeders like tomatoes of peppers in the area, it’s wise to add the nutrients especially primary and the missing ones by the next season
Third, be careful
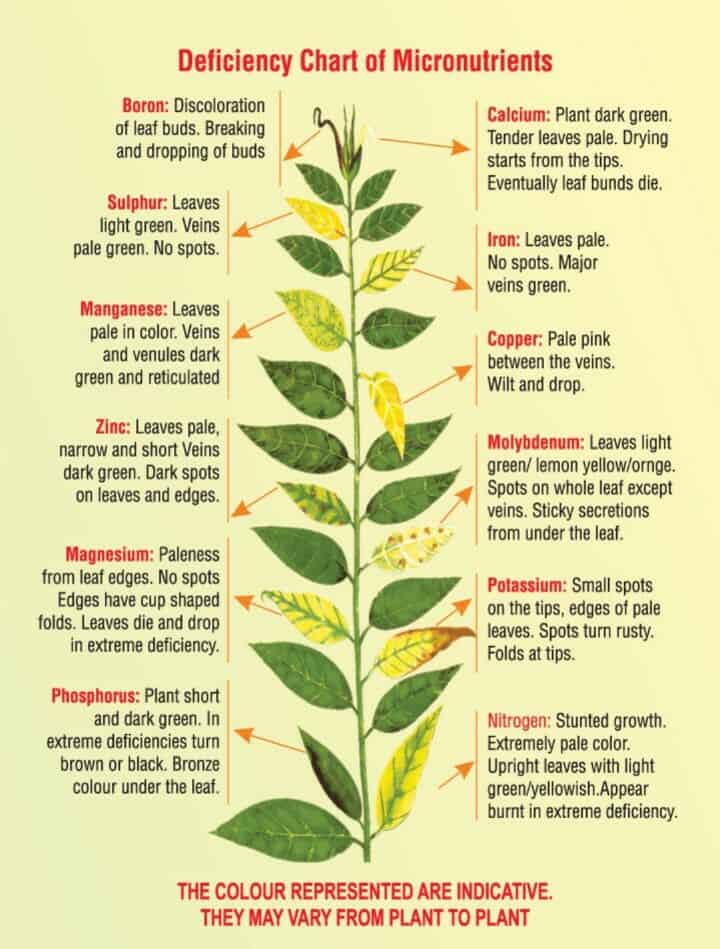
it might sound like a good idea to just add nutrients to your plants without knowing what they need, but you can actually burn your plants of just kill them by adding nutrients that they don’t need this is why it is mandatory to know what does your soil is lacking from either by testing the soil or watching the plant growth closely and reading the signs of missing nutrients
this image help you spot the diffeciencie that there are in the plants and help you learn more about the plant to provide the right nutrients for it
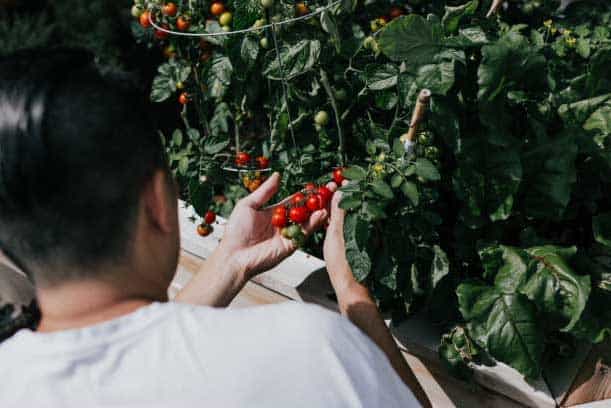
Tomatoes are probably the most satisfying plants to experience on your garden, even thought they may not be the easiest to grow we all want the experiment with them at every spring, I mean who doesn’t want to see small tomatoes growing in your garden! they are cute like babies , and it is soo much fun!!!
In this guide we are going to provide you with all the necessary knowledge for you to be able to grow your precious tomatoes indoor or in a small garden, enough missing up this year you’re going to get them right.
Getting your seedlings ready
You can either start your own seedlings at home or just by them from the nursery, we will make sure that you get the best start possible because it will be the N°1 factor for your success.
10 steps to start tomato seedlings at home
In fact creating your own seedlings at home is easy and you’ll get to live the full experience with your plants from the moment you put them on the soil until they become mature follow those easy steps to create the best possible plants :
Step 1:choose a variety of tomatoes that you like and consume frequently; there are so many varieties and it’s all depends on your personal preference after all you are the one who is going to eat them.
Step 2: buy good quality seeds from your seed provider (it is preferable that you get the highest quality diseased free seeds)
Step 3: start sowing those seed from late January until late mars indoors and from early mars until late April outdoor ( if the last frost has passed)
Step 4: put them on a 7cm pot or seed starter in moist compost or in sterile seed-starting mix
Step 5: water them and cover with a cling film (remove it as soon as they germinate)
Step 6: put them in a warm place close to a bright windowsill.
Step 7: transplant them separately in 5cm pots when they have their first set of true leaves.
Step 8: provide abandon amount of light ; preferably strong direct light at least 14 to 18 hours
Step 9: move and sway in breeze or turn a fan ; breeze will develop strong steem for the plant
Step 10: move them outside as soon as the weather warm up and you have worked the soil
What seedlings to buy from the nursery
If you’ve decided to buy seedlings done for you from the nursery it is crucial that you choose the best ones, but it isn’t always obvious know how to inspect them otherwise you are deemed to fail from the beginning:
Avoid the biggest and tallest. your fist move is to choose the tallest seedling on display, it’s not always the best choice.
these may have been competing for light in the growing conditions but Smaller seedlings are more likely to grow faster and suffer less transplant shock.
Look at the roots, roots are what defines if a plant will do or die,
Check the rooting system by gently and carefully lifting the seedlings from the pot, good ones should have well formed root balls holding the potting mix in a solid mass (not too long that they couldn’t find space and not too short that they could’t lift the soil) Ask the seller if you’re allowed to check it is the best insurance policy.
Check the foliage, Leaves should be a consistent strong solid color
Make sure that they do not have any yellowish part or any sort of spots beginning to form, or any evidence of disease.
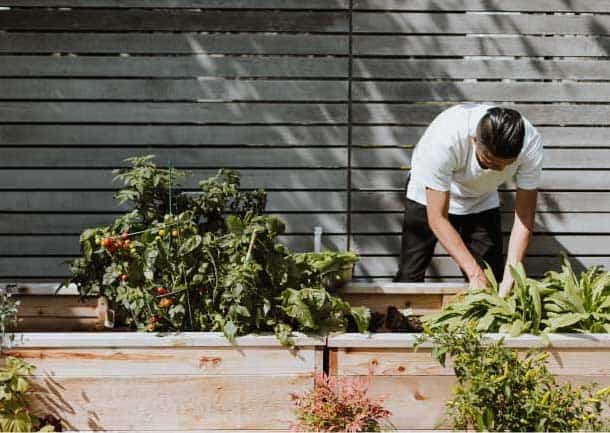
Moving the seedling outside
Like we said tomatoes need to have a lot of nutrients so you need to move your plants to bigger containers or to your raised beds for them to have more space also make sure you are choosing the sunniest place possible and then start by preparing your soil:
how to prepare the soil
Tomatoes are heavy feeders and they need a lot of nutrients and an abundant amount of sun to be able to give you the best possible yield, and for that you need to enrich your soil with peat free potting compost, you’ll also need to pre heat your garden soil days before moving your tomatoes in.
Your tomatoes won’t grow if the soil is cold or freezing they will rather die, if you want to move them early into the soil make sure to cover it with a blanket or a piece of plastic for a week or two to warm up and keep a consistent warmth day and night or wait until may for it to get warm naturally and then move them outside.
Start digging your soil: You can grow them in rows in your garden soil or raised beds or you can choose to grow them on at least 30cm pots or containers, either ways make sure to space between the plants is at least 2 to 3 feets (50-100cm) and 5 feet (150cm) between the rows.
To plant your seedling you have two options: either plant them deep into the soil or you can do the trenching method to plant it horizontally by gently bending the stem up. And just fill in the trench. Around the tomato plant, Leave few top leaves on top of the soil, and the plant will develop roots on the stems to give you a strong more reliable built that can get the nutrients it needs easily.
Now you can choose to put cages or stackes depending on the variety that you chose to plant indeterminate or determinant * make sure to implant them before moving your plants to make sure you are not shocking the plant do this in the seamless way possible
make sure not to put mulch as soon as you plant them especially if the soil is still cold, as soon as temperature is consistent , add mulch to keep moisture and protect from the weeds to come.
Phase 3: provide the best care and nutrients for your plants
When the plant is growing and starting to flourish, make sure to pitch out the side shoots especially if you are growing indeterminate varieties this will help the plant concentrate more energy on growing fruits rather than leaves, you can keep one to two side shoots in the determinate plants especially if you are using a growing cage.
after the first fruit start to take form you will need to start adding tomato food fertilizer weekly for the plant to be fully capable and produce high quality fruits, then you need to make sure you strip aways leaves underneath the suits for better light and air circulation.
When you have at least 4 trusses (clusters) on a single end pinch out the growing tip, this is a sign for the plant to focus on growing big quality fruits rather than volume low quality, also in the end of the season if you want the plant to hurry up and ripped the fruits.
Watering your tomatoes :
We talked about watering your tomato plants in a dedicated section because it is one of the main factors people don’t succeed growing tomatoes and before the know it the plant is dead.
So you have to be careful: tomatoes will need generally one inch of water per week for the normal days, when the days start to heat make sure you give it a little more, leaves will tell you if they need water(when you see them wilt most of the day) but make sure not to over water and flood the roots (roots need air too) or under water until you kill the plant , keep it in the middle
inconsistent watering will make your tomato fruits to split and crack or catch diseases such as blossom end rot (causes deficiency of calcium), what happen is that rapid changes in soil moisture levels cause fruits to expand quicker than the tomato skin can grow and they split also this inconsistency keep calcium from achieving tomatoes and causes black spots on them.
Also make sure you water the soil not the leaves or the steams, to avoid some other diseases.
how to protect your plants from diseases, pests and worms
Make sure to cut the lower branches especially if the leaves are touching the soil, to avoid catching fungus and soil borne pathogens can easily get into them.
do not over feed, too much nitrogen can cause the plants lush and not really fruitful
if your leaves are turning yellow, this might be a sign of nutrient deficiency so make sure you are providing them with the right nutrients.
If you’ll face tomato worm you need to get rid of them as quickly as possible, otherwise they will consume all of your fruits.
make sure to take a look at this article if you have any problems or diseases on your plants.
Harvesting your tomatoes
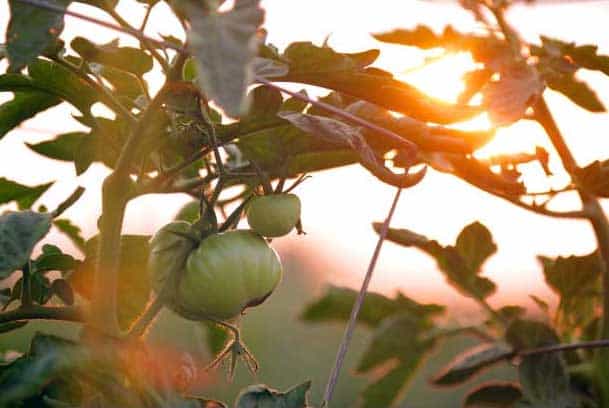
After 40 to 50 days from the day your seedling get out of the soil you’ll start to see fruits that are starting to take form and start growing make sure they are exposed to light and not covered with leaves.
you can eliminate the new fruits that form in the top to let those in the bottom become enormous, or pluck any ripen tomato once it achieve the desired size to give the chance for others to get bigger fast.
when they achieve the perfect size and start to ripen on the plant, ease up watering to make sure the plant will give them more sugar and they will have more flavor, be careful not to withhold water that the plant continuously wilt and stress (stress make it drop blossom and fruits)
Towards the end of the season prune off older leaves to let in more light and get the tomatoes to ripen vastly or you can get them to ripen indoors
Storing your excess of fruits:
tomatoes are better eaten fresh after harvest or store them in room temperature, they don’t freeze well so avoid the fridge that can make them develop a mealy texture.
if you still want to freeze them we suggest you do it by making them tomato sauce
Now that you finished ready what was the most helpful tip for you , share it in the comments bellow
Every fertilizer that you add to your edible plants will contribute to making your food, next time you say you have an organic garden see what those fertilizers contain.
Food that you eat is for your body to use as a source of nutrients for its growth, start by asking yourself if this product is going to affect your health and try to read about the effect of its component on the human body in the long term use.
Well, today, we are bringing you alternatives for synthetic fertilizers, a list of recipes and products that you can use without harm to provide a ton of nutrients to your plants and body.
Things you should consider:
The type of fertilizer you choose depends on the kind of soil that you have. So don’t choose based on popularity what works for others may not work for you:
You should have good knowledge of your soil:
Here are some steps you could use to get every information you need to know about your soil to be able to give it the requirement that it thrives for:
First, what type of soil do you have
What type of soil do you have? (clay, sand, or loam) Loam is considered the best of all, but most of us combine all three, with either clay or sand featured more prominently.
Sandy soils are excellent with drainage, almost too great, but have difficulty holding nutrients. Clay soils are fertile but have drainage issues and are really hard to work.
Second, what nutrients does it need?
If you don’t know what nutrients your soil is missing, do a quick test to be sure. They don’t cost much and are usually done through your local horticulture extension or buy home test kits. Check soil test kit here
The main ingredients in most fertilizers are nitrogen, phosphorous, and potassium (NPK), but the percentage of each component in all types of fertilization varies greatly. What one plant thrives on another may not need, so use the manufacturer’s suggestions if you buy a packaged fertilizer to see which type of plants it is made for.
Third, How about the PH levels?
Your soil’s PH levels and the fertilizer you present might be working against the plants rather than helping them!
For example, if a plant shows signs of phosphorus deficiency and the soil is too acidic, it wouldn’t matter how much phosphorus fertilizer you apply. Your plants won’t be able to use them.
A neutral pH or slightly acidic for vegetables allows the fullest availability of nutrients to all plants.
To adjust the soil’s pH, you’ll need to determine the pH according to a soil test. From there, you can add either lime or sulfur, depending on whether you want to raise or lower the pH.
After doing the pH test, check this article on how to change your soil’s pH levels.
Note that fertilizing your vegetables only helps if the cause of the low growth/production is a lack of nutrients in the soil. Other factor such as shade, watering … can’t be fixed by fertilizing.
Types of Fertilizers
Fertilizers could be characterized by two categories organically and synthetic here in this article; we are going to cover most of the organic options that you have:
Organic fertilizers:
Organic fertilizers are made from products that are derived from natural sources. Organic fertilizers can carry water and nutrients and also amend your soil. Moreover, they are biodegradable, renewable, and environmental friendly. Since it is a slow-release fertilizer, there is no chance of over-fertilizing or creating toxic salts in your soil. The nutrients in these types of natural fertilizers are not refined or extracted; you can find them in these three types:
Powders:
Fish and plant meals are beneficial to gardeners who want finer granules to work into the soil and if they plan to mix them with other organic ingredients to make a custom fertilizer.
Granules:
Many tend to sprinkle the contents over the soil and then wait for it to be broken down and then absorbed, but this isn’t how to use them! You should try mixing them with the soil before transplanting, they slowly break down to feed the plants continuously
Liquids:
Most liquid products are sold in the concentrated form and need to be diluted with water. If you want to put your fertilizer in a spray bottle to spray the foliage or if you need to feed regularly as you water, then liquid fertilizers are an excellent choice.
Organic fertilizers work differently than chemical fertilizers, and it will take longer for you to see the results since they have a slow-releasing paste. Because they rely more on microorganisms and nature to help them break down, it can be frustrating to the impatient gardener who wants to see immediate results.
Synthetic Fertilizers
Some information about Synthetic fertilizers:
they are derived from the petroleum industry and tend to be acidic they serve the macro level of nutrition needs for the plants providing (NPK)
Some fertilizer blends offer secondary nutrients of calcium, iron, molybdenum, sulfur, and magnesium, but almost none contribute to the complete spectrum of micronutrients a plant needs for complete growth.
They work faster than organic fertilizers, but that benefit comes with a side effect. They can slowly drain all the other nutrients from the soil and, in the end, might start to decrease the growth of the plants.
Synthetic fertilizers do nothing to sustain soil health since they do not replenish any trace elements depleted from the garden beds’ continuous cropping.
The increases in the release of greenhouse gases, upsets the beneficial microbes needed by the plant, and acidifies the soil.
The danger of over-fertilization due to the excessive availability of nutrients in chemical fertilizers which builds up toxic substance that are harmful to your health
Alternatives to bring nutrients
Our first solution to bring back the nutrient to your soil is to get the cycle of nature repeating but making sure you are not wasting those valuable scraps that could be used as a long term solution:
Tree Leaves
Rather than bagging up the fall leaves and putting them out on your curb, collect them for your gardens instead. Leaves are rich with trace minerals, they appeal to earthworms, they preserve moisture, they usuallyassist make heavy soils lighter. You can use leaves in two ways: Either till them into your soil (or mix crushed leaves into potting soil), or use them as a mulch to fertilize your plants and keep weeds down.
Grass Clippings
You probably havelawn waste, so be sure to gather your grass clippings to use in your garden. Half an inch to an inch of grass clippings makes an ideal weed-blocking mulch, and additionally it is rich in nitrogen, which is an important nutrient for all crops.
Weeds
Just like grass clippings, many of the weeds that you’ll find in your gardens are very high in nitrogen and will make an excellent fertilizer. The problem is, once you’ve pulled the weeds, you certainly won’t want to put them back in the garden because any seeds will sprout and make new weeds. The solution? Make weed tea.
To do that, fill a five-gallon bucket not more than one-fourth filled with weeds that you simply’ve pulled. Then fill the bucket the rest of the way with water, and let the weeds soak for some weeks. As soon as the water turns brown (like tea), pour this weed tea in your gardens.
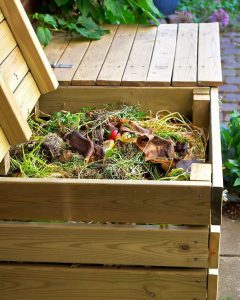
Kitchen Scrap
Put your kitchen and garden waste to work by making your compost. Compost releases nutrients slowly, which means a well-composted garden can go a year or two without requiring fertilizer reapplication. Compost also helps the soil retain moisture, which is essential for vegetable gardens to thrive during hot, dry summers.
Manure
Manure comes from a variety of sources — cows, horses, chickens, and even bats. Each type of waste is high in nitrogen and other nutrients, but you’ll need to use it carefully. Raw manure is highly acidic and may have more nutrients than your plants need, so too much can burn your plants. It’s best to use composted manure. Since it’s much less nutrient-dense and acidic, you should use extra of it to enhance your soil’s water retention without risking your crops. You won’t have to wait for a long time because manure rapidly turns to an ideal odor-free soil amendment.
Coffee Grounds
Coffee grounds include plenty of uses, however, one among their greatest is as a fertilizer. Many crops, similar toblueberries, rhododendron, roses, and tomatoes thrive in acidic soil. Recycle your coffee grounds to assist acidify your soil. There are a few methods to do that, you’ll be able to either apply it by sprinkling the used grounds over the top of the soil, or you can also make “coffee”to pour on your gardens. Soak up to six cups of used coffee grounds for up to a week to make garden coffee, then use it to water your acid-loving plants.
Eggshells
If you’ve ever used lime in your garden, then you know it comes with lots of benefits — chiefly, it helps lower the acidity of your soil for plants that don’t like acid, and it provides plants with lots of calcium, which is an essential nutrient. Wash out the eggshells from your kitchen, keep them, and crush them to use in your garden. It turns out that eggshells are 93% calcium carbonate, which is the scientific name for lime.
Banana Peels
We eat bananas to get some potassium, and roses love potassium too. Bury peels in a hole alongside the rose bush so that they can compost naturally. Because the rose grows, bury the peels into the soil’s high layer. Both of these approaches will provide much-needed potassium for the plant’s proper growth. Read about composting here.
All the above; Compost.
Compost in a gold mine of nutrients that gives a variety of totally organic matters benefiting the pant in all aspects of its growth.
Of course, compost is not the go-to solution if, for example, you have a deficiency problem with your actual tomato plants; its efficiency is seen in the long run, so you can use it to work the soil and fill it with the right nutrients right from the beginning of the season
because food scraps produce compost, nutrients on it will depend on the things you provide it with, so make sure you follow the right recipe to make good quality compost, here is an article about it
Raw materials
You can add many other amendments to the garden to boost your harvest and improve your blooms. Raw materials created from the grinding of dry, natural supplies speed the decomposition process for microbes and assist convert the elements extra fast. Use these raw materials individually or mixed to attain multiple benefits.
Raw organic fertilizers and their uses:
Organic alfalfa (2,5:0,5:2,5) A non-burning supply of nitrogen and incorporates the naturally occurring development hormone, Triacontanol, boosts seedlings’ progress rates.
–Corn gluten meal (8:0:0) Fertilizes lawns and shrubs while preventing weeds from emerging. Helps properties develop deeper roots and require less watering.
–Bone meal (4:12:0) Boosts root growth at transplant and benefits at fruiting.
–Fish bone meal or Fish meal : Non-burning source of nitrogen and trace elements. Also, an excellent soil conditioner.
–Greensand (0:2:5) Contains glauconite, which is high in iron, potassium, and magnesium. It also helps loosen soil, improve moisture retention, soften hard water, and increase root growth
Growing potatoes might be one of the easiest and most satisfying experiences in small and even large gardening productions and in this guide not only are we going to provide you with the right knowledge to perfect your potatoes gardening experience we also are going to respond to all the question that you might be asking yourself and make it easy for you to succeed this experience either you are growing them for the first times or tens to hundreds of times you will find some interesting facts that might be a game changer for you and for your crops.
1) Preparing to plant potatoes :
Potatoes are better grown in rows, dig 6 to 8 inches (15-20cm) deep in the soil you also need to give them some space for them to spread their roots 12 to 15 inch (30-37cm) between each crop should be enough in most cases spread some compost in the bottom for them to get as much nutrients and give you a high quality harvest.
We also advise you not to cut the potatoes into half parts especially small ones even if they have multiple sprouts and they might give you 2 to 4 plants from the same seed and survive just fine together, because the cutting might lead the potato to get rotten up and attract insects and be diseased in the soil, If you happen to have large potatoes with many sprouts you can do the cutting but keep them for 1 to 2 days before planting them for them to heal and create a protective layer.
2) Planting potatoes :
when do you start to plant potatoes:
Potatoes are cool crops which means they prefer the soil to be cool in the root development but needs full sun for the plant to produce, For most climate zones you can begin planting potatoes in March in containers indoor (move them outdoor as soon as plant start to grow, for full sun) You can begin growing them outdoor from early to mid-april, generally before 6 weeks from the last frost ( make sure soil temperature doesn’t go bellow 45f (7°c).
What soil is better to use to plant potatoes:
You will need to use a rich well-drained loamy soil. A mix of potting soil and compost with added sand (about 20% of the total) serves potatoes well. you can add a handful of well-balanced organic fertilizer to add good nutrients into it.
Hilling / earthing up:
After potatoes plants emerge from the soil and start growing it is preferable to start adding soil with a hoe to cover and protect the tubers from the light (light could cause the potatoes to turn green and because poisonous because of a compound named “solanine” that is toxic and will make your potatoes bitter and inedible)
How long to grow potatoes:
You will know that your potatoes are ready to harvest Potatoes take from 70 to 110 day for it to be fully mature and ready for a good harvest, you will also know that the plants are ready for harvesting when you spot flowers on top of the plant it means that they are already forming tubers inside the soil you can let them harden for another 2 weeks and by this time you can see the plant starting to die back it is the perfect moment to harvest if you are planing to store them you can let the plant die completely and then harvest them.
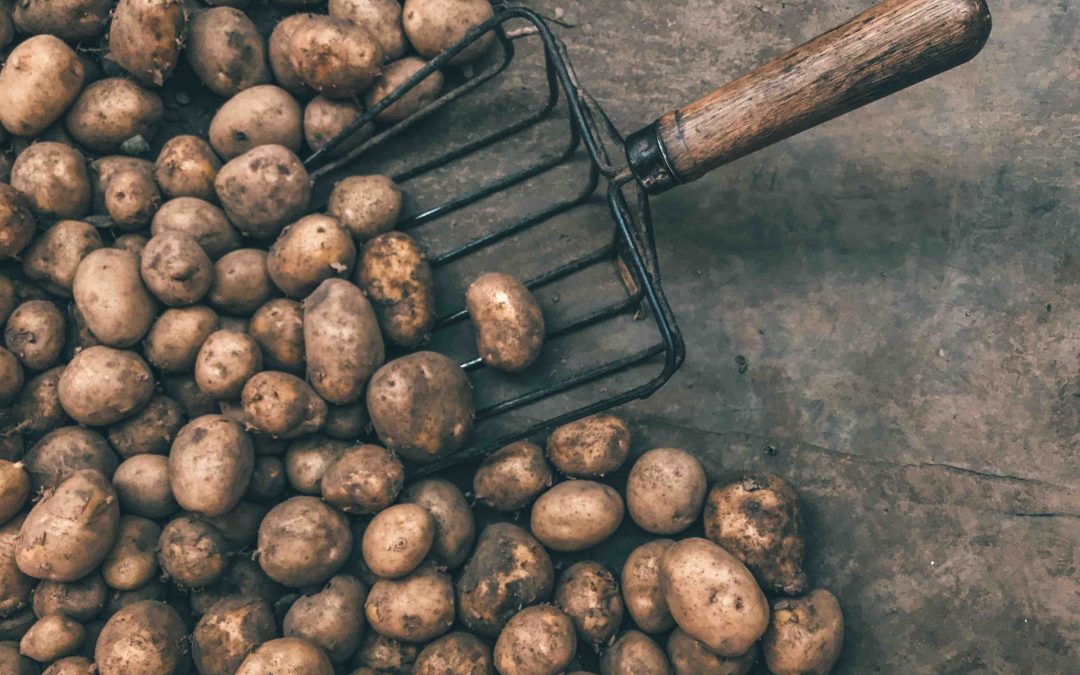
3) Harvesting
When your potatoes are fully mature and are now ready to harvest choose a dry day when the soil is not wet for it to be an easier job to find the crops and dig your way to all of them, also to get clean tubers so you won’t need to wash and that are good for storing.
the tools that you will need for this process are : a shovel or pitchfork if you grown them in the field soil or a trowel if it is in a raised bed or a container, you need to have careful attention not to harm the tubers.
how many potatoes do you get per plant:
In average you are going to get 10 potatoes for your harvest out of every plant and depending on the variety that you are growing, weather conditions and type of the soil, you can see more information about that in this article.
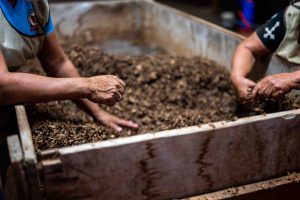
4) Curing your potatoes :
Curing potatoes is is a process that is going to make the skin of your potatoes to thicken and slows the respiratory rate of your tubers which makes them less susceptible to bacteria and mold it is done for the purpose of storing them in the best condition otherwise you will end up with a bunch of rotten potatoes sitting in your basement in the end of the month.
When you harvest your potatoes bring them inside into the basement or a cool dry place in your house, inspect all your potatoes and make sure they are not cut or damaged when they where into the soil (these ones should be consumed right away), then you need to rub all the dirt from the ones that you are going to store, let them dry and store them in a cool place between 45 to 60 degree F (7°-15°c) and a relative humidity of 85 to 95 in a ventilated area away from direct light
you can lay them on top of several layers of news paper or a cardboard for 2 weeks and they are ready to be stored through the whole winter
Different places you can grow your potatoes in:
Potatoes could survive different environments and give you a generous produce, they also could be relatively easy to grow no matter where you choose to place them, if you follow few instructions :
plant potato in field
The normal way, used by farmers this method which happen to get a satisfying produce will be not preferable if you have hard rocky soil that will be so difficult for the tubers to form in, also make sure not to harm the tubers when you harvest.
plant potatoes in a bag
Potatoes grow bags are made specially for an easy satisfying experience there are different forms of them but the ones with an opening on the side to take tubers are our personal favorites, because you can take the mature ones and let the small ones grow bigger, you can start with a half empty bag of soil to cover the seeds and begin adding soil after they emerge 3 to 4 times following their growth to get better produce and protect your tubers from the sun.
plant potatoes in containers
potatoes on containers tend to work really good and comparing the results you can achieve a hight volume quality harvest from them even more that when they grow in normal field soil you can see this video to see the results of the comparison
plant potatoes in raised beds
Raised beds tend to be the best option for potatoes, due to the space provided for their growth and you have the ability choose the best quality soil that will support their growth.
how to plant potatoes in a laundry baskets
Laundry baskets are a fun way to grow potatoes they have the lower space of the basket covered to retain the soil (drainage holes are mandatory in this case) and the sides hole to protect and support the plant.
Other places you can grow potatoes in :
You can grow potatoes almost everywhere and here are some of the options : in pots, in a barrel, in a trash can, in hay, in tires… and list continue, just use your creativity and you are ready to go.
Seasoning
can you plant potatoes in the fall
Depending on the variety you have ( if it is late season or early season ) and the climate zone you live in (check this card for better info) if you happen to live in a relatively warm zone between 9 and 11 the you should be able to grow potatoes just fine, but other than the it would be preferable to cover the plants from the winter frost since those plants will have to grow for 3 consecutive months.
How to grow potatoes in winter
to grow potatoes in winter you either grow the in a green house or cover the top with a
will potato plants survive frost
most varieties of potatoes doesn’t do really well in the frost so if you know that there is a coming frost shortly after you plant them or before they achieve maturity you better cover them with some blanket or a some varieties grow perfectly fine even during the frost but it is preferable that you cover them with mulch and if you are growing in December it is preferable that you put a winter cover
General knowledge about potatoes
The difference between seed potatoes and regular market potatoes
Most gardeners will tell you to now grow potatoes from you market store, and there is a reason for that ; because they have been grown and treated in a way to maximize storage and minimize sprouting, seed potatoes in the other hand are small crops that are disease free that are kept to sprout for planting but ahead from that market potatoes are also safe to grow especially if they already begin sprouting in your house due to high temperature weather or other factors, that will save you from waiting for your seed potatoes crop to be ready (it might take time).
how long does it take potatoes to sprout
Depending on the conditions that the have been stored humidity and warmth are huge factors to …. the sprouting ,from the time potatoes grow out of soil on average they take about 3 to 4 month to actually sprout, but the ones that are sold into the market are generally treated in a way to maximize the storage period, this is why we do not recommend trying to get them to sprout as long as they don’t do it naturally, it is preferable that you order your seed potatoes to get hight quality disease free seed ready to be planted.
Can you plant unsprouted potatoes
Yes, planting potatoes that are not sprouting is fine watering the soil will provide the right environment for them to start growing and it will push them to fasten the process (do not heavy watering them) even if you grown potatoes this year and forget some tubers in the soil you will have new plants coming out of the soil.
How to speed up potato sprouting:
you can get potatoes to sprout quickly by simply storing potatoes in a dark, warm place preferably full of humidity (you can use a sprayer and spray them with water to humidify the place ) this will create a suitable environment to hack their growth and make them begin sprouting fast. you should see the potatoes eyes (buds) appearing in about a week or two then move them into light.
Plant old potatoes
yes you can plant old potatoes even if the are not sprouting (except for the ones with diseases) , even if they won’t grow they will transform to compost and amend the soil naturally, be aware of diseased potatoes that could eventually spread the disease to other plants and make it an awful experience for you
Where to plant potatoes sun or shade
Potatoes needs to be planted into direct sunlight, 6 hours of direct sunlight preferable for their growth, a shady place could cause them problems and affect their growth so we advise you not to do so.
How to plant potatoes indoor /growing potatoes indoors
growing potatoes indoors might be tricky you will need to keep them in a place full of light from the moment the crops go out of soil or provide the necessary light for them so that they could do the photosynthesis activity, you can start them indoor and move them outdoor to continue their growth.
Is it too late to plant potatoes :
Like we said, potatoes are cool crops you generally could grow them until late fall and mild winter (warm weather zones) to get them harvested during Christmas, if you are in a zone of heavy frost make sure to plant your crops 2 months before the fist frost.
How do you maximize a potato yield?
You can maximize your yield by planting good varieties , providing good quality soil, exposing it to the sun for at least 6 hours a day and watering it frequently , make sure the plant isn’t facing any sort of disease or insect
Plant potatoes roots up or down
You can plant potato sprouting in any position you want, But it is preferable to put them to the top because their growth is not in one way direction they follow the direction of the sun and light to go to the surface of the soil.
potato companion plants
companion plants for potatoes
potatoes are heavy feeders so it is preferable that you plant them alone
Now it’s tame to answer some different types of questions that maybe not a lot of people thought of but why not …
potato leaves aren’t poisonous and there are edible for most varieties there is a myth that in the late centuries with the discovery of potatoes the leaves were king’s food and the slaves where the ones eating the tubers
growing roses in potatoes
this pratique is generally seen in some viral facebook videos might be genuine in a way that potatoes transform into compost to amend the soil when it decomposes but you might sendup getting some potato crops with the roses which is not something you intend to do I guess, so I will prefer growing roses in another more practical way than that , I will recommend checking this article for more information
is a potato a root
indeed, potatoes are considered roots because they tend to grow inside the soil
is a potato a tuber
yes they call it a tuber or a root and this is because
is a/ are potato a vegetable / fruit
potatoes are actually not a fruit
Are coffee grounds good for potatoes?
coffee grounds will decompose to create compost for the plant and this will be beneficial for the plant but the aren’t going to be a changing factor for your yield, we prefer creating out own compost and amending the soil with high quality nutrients for the potatoes to find all that they need to strive
How many potatoes should I plant for a family of 4?
for this question we brought to you an awesome calendar that is going to give you all the plants calculation to grow exactly what you need , click here
growing yukon gold potatoes
the response to this question will be provided soon
growing potatoes in straw / growing potatoes in straw bales / growing
potatoes in containers with straw
yes you can grow them this way and get a really good produce.
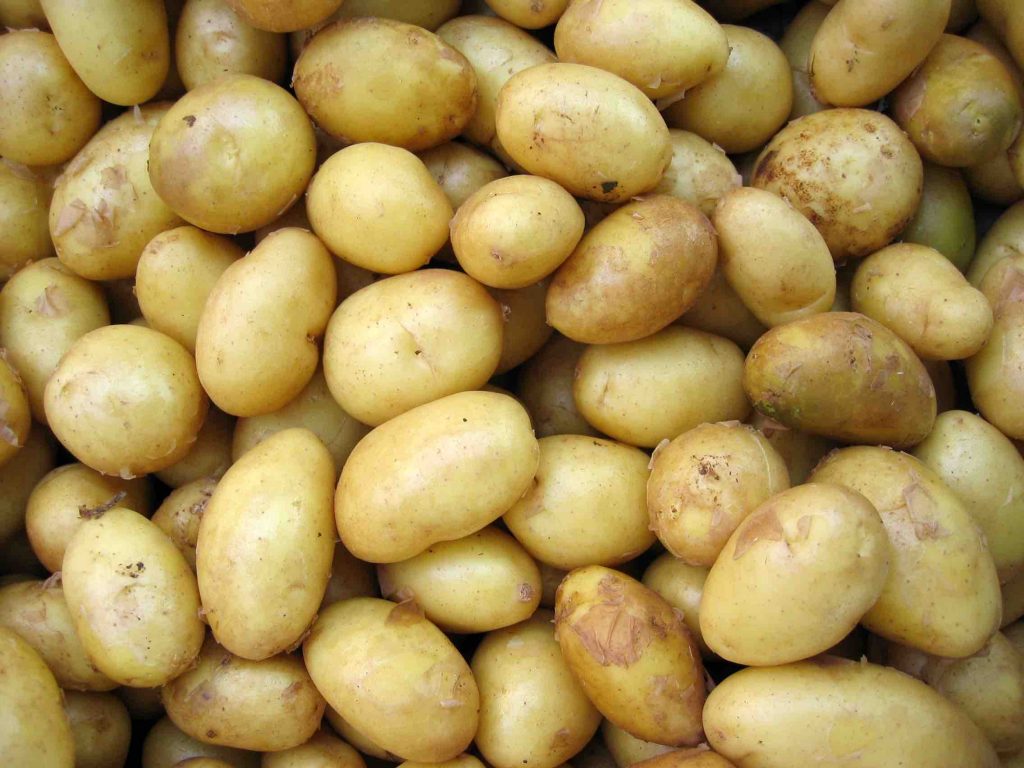
what does a potato plant look like / what do potato plants look like / potato plant pictures:
we have the picture in the beginning of this article, go there and see it
you can see much more article like this one about other vegetables on our blog
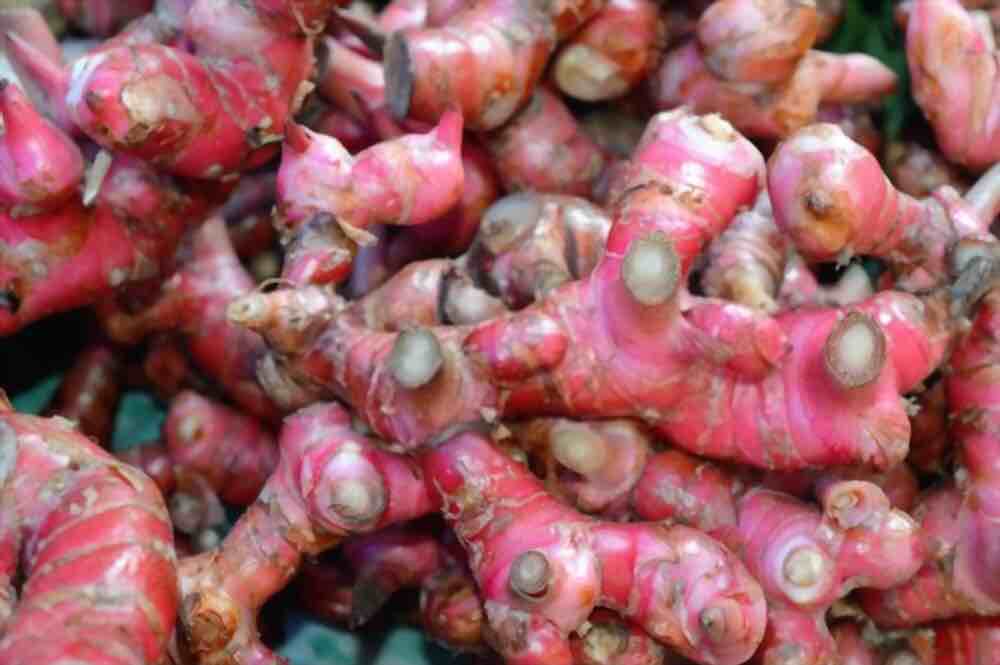
The scientific name of red ginger is : Alpinia purpurata
Red ginger belongs to the Zingibera ceae family (ginger) and is also called by these common names : Jungle queen (this is the female and it has pink flowers), jungle king (male has red flowers), the wild has Deep red inflorescence, Tahitian ginger, Ostrich plume, pink cone ginger and it Hawaiian name is : Awapuhi – ‘ula’ula
Origins of this plant
This plant is a tropical plant and is originally from Malaysia , it is also the national flower of Sumoa “Tanila” , A really popular plant in Hawaii and it is considered as an invasive plant in the Hawaiian forests.
What are the benefits of red ginger ? red ginger facts
There are many studies that confirm beneficial effects of red ginger against the symptoms of diseases, i.e. anti-inflammation, antioxidant, antiemetic, antibacterial and antidiabetics. Although the medicinal properties of red ginger have been known, further trials in humans are required to determine the efficacy of red ginger (or one or more of its constituents) and to establish what, if any, adverse effects are observed. Source
Is red ginger edible ?
Although that are some people who actually ate and complement the strong flavorful taste of the red ginger (the roots) but real studies didn’t achieve the point to say that this plant variety of ginger is actual edible so the real answer is : it is not preferable.
what is red ginger good for ? red ginger uses :
This plant has two main component that are used in totally different purposes :
Red ginger root utility
Red ginger is known for it’s rich oil and the strong fragrance properties combined with many health benefits which make it a central component that is generally used on cosmetic products
Red ginger flower utility
The beauty of it’s flower or let’s call it is a floral bracts which are actually leaves that assemble in the top of the plant (the real flowers of this plant are in fact small white and are located on the tips of those floral bracts they las for almost 25 days ) due to the nature of these floral bracts they bloom all year long (evergreen) and will make it a central piece of your garden adding colors and will make it one of it’s kind some people cut them and use them as arrangements
How to grow red ginger plant ? red ginger plant care
Red ginger is relatively easy to take care of, you can grow it in your garden or in a container or a pot in a rich high drainage soil, it is preferable that you enrich the soil with high quality fertilizer each month to achieve constant growth and vivid colors of the plant the PH should be around 6 to 6,65 and water around 1inch each week
This plant could grow 5 ft and beyond could achieve 8 ft inn some cases and support growing in full sun or in the shade also you can grow it indoor or outdoor at one condition is that the temperature of the soil should not go below 45 f otherwise the plant will die, if you live in the zones between (9b to 11) you should be fine growing it outside.
How to propagate red ginger ?
You have to ways for this operation either to take the seeds that are rarely produced by the flowers and sow them into hight quality sowing soil or cut the rhizome of a piece of ginger let it in a dry place for 8 days and plant it in a rich well amended soil
How to successfully plant red ginger from seeds
If you happen to have seeds of red ginger from a plant which are rarely produced or by buying them you can follow these instructions to succeed growing them :
Put those seeds in a hight quality sowing soil preferably indoor or cover it to keep the humidity in
water them constantly until the plant appears
when the plant start growing move into a container to be able to move inside to protect it from the frost
it is preferable to help it grow by adding a fertilizer each month and watering it around 1 inch per week
place it on a bigger container or move it to the soil if it is necessary
prune it regularly
How to prune red ginger ?
It is preferable to prune this plant frequently to achieve full maturity and you can do that following those steps:
Grasp the base of the stem with the dead or dying blossom.
Use pruning shears to cut the stem off near the base of the plant
Prune these stems continuously throughout the year each time a bloom fades.
Red Ginger plant stems only produce one blossom that stays for a long time, so pruning these off makes the plant more attractive.
How long does it take to get the red ginger flower ?
Depending on how you planted this plant in the beginning you can see the flower starting to bloom early planting it from the rhizome ( it will take around a year to achieve this point) on the other hand if you planted this plant using seed you generally have to wait around 2 years to have a fully grown flower.
make sure to leave a comment if you are planing to grow this wonderful plant and visit our blog for more awesome content like this
Hey there! My name is Aïmene and I pretty much run the show over here,I started gardening when I were 12 y.o, since then my passion towards it just grow and now i have a mission to help people like me, with no large fields to Grow their own food in containers.

 Harvesting your tomatoes


Recent Comments