Select Page
The complete guide : POTATOES from growing to harvesting

The complete guide : POTATOES from growing to harvesting

Growing potatoes might be one of the easiest and most satisfying experiences in small and even large gardening productions and in this guide not only are we going to provide you with the right knowledge to perfect your potatoes gardening experience we also are going to respond to all the question that you might be asking yourself and make it easy for you to succeed this experience either you are growing them for the first times or tens to hundreds of times you will find some interesting facts that might be a game changer for you and for your crops.

1) Preparing to plant potatoes :

Potatoes are better grown in rows, dig 6 to 8 inches (15-20cm) deep in the soil you also need to give them some space for them to spread their roots 12 to 15 inch (30-37cm) between each crop should be enough in most cases spread some compost in the bottom for them to get as much nutrients and give you a high quality harvest.

We also advise you not to cut the potatoes into half parts especially small ones even if they have multiple sprouts and they might give you 2 to 4 plants from the same seed and survive just fine together, because the cutting might lead the potato to get rotten up and attract insects and be diseased in the soil, If you happen to have large potatoes with many sprouts you can do the cutting but keep them for 1 to 2 days before planting them for them to heal and create a protective layer.

2) Planting potatoes :

when do you start to plant potatoes:

Potatoes are cool crops which means they prefer the soil to be cool in the root development but needs full sun for the plant to produce, For most climate zones you can begin planting potatoes in March in containers indoor (move them outdoor as soon as plant start to grow, for full sun)
You can begin growing them outdoor from early to mid-april, generally before 6 weeks from the last frost ( make sure soil temperature doesn’t go bellow 45f (7°c).

What soil is better to use to plant potatoes:

You will need to use a rich well-drained loamy soil. A mix of potting soil and compost with added sand (about 20% of the total) serves potatoes well. you can add a handful of well-balanced organic fertilizer to add good nutrients into it.

Hilling / earthing up:

After potatoes plants emerge from the soil and start growing it is preferable to start adding soil with a hoe to cover and protect the tubers from the light (light could cause the potatoes to turn green and because poisonous because of a compound named “solanine” that is toxic and will make your potatoes bitter and inedible)

How long to grow potatoes:

You will know that your potatoes are ready to harvest Potatoes take from 70 to 110 day for it to be fully mature and ready for a good harvest, you will also know that the plants are ready for harvesting when you spot flowers on top of the plant it means that they are already forming tubers inside the soil you can let them harden for another 2 weeks and by this time you can see the plant starting to die back it is the perfect moment to harvest if you are planing to store them you can let the plant die completely and then harvest them.
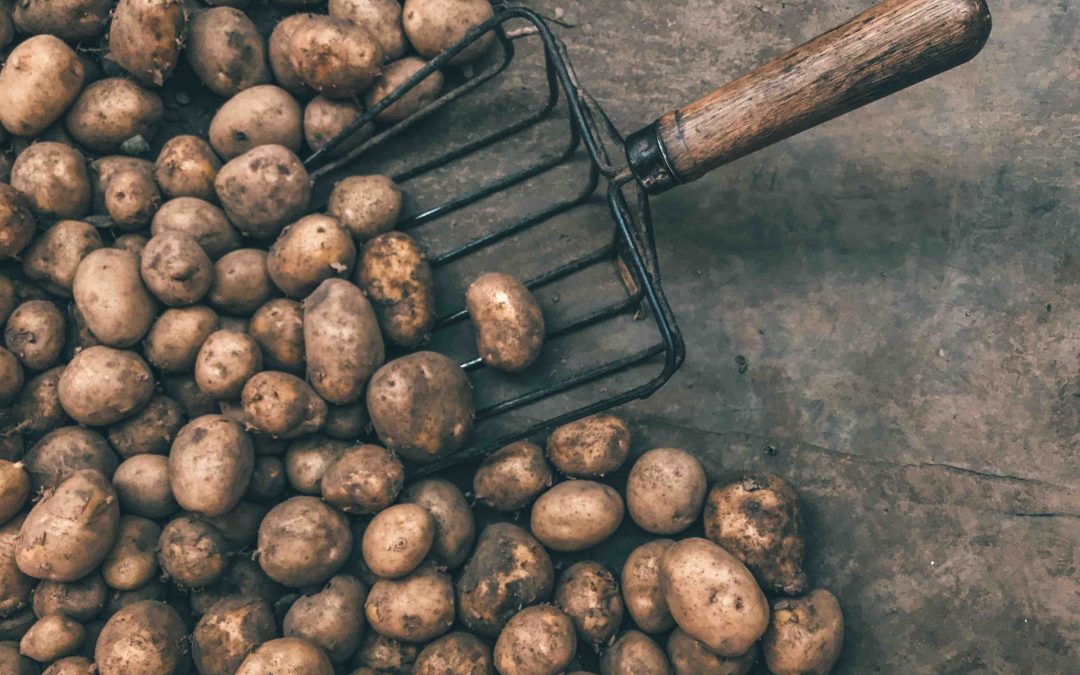
 

3) Harvesting

When your potatoes are fully mature and are now ready to harvest choose a dry day when the soil is not wet for it to be an easier job to find the crops and dig your way to all of them, also to get clean tubers so you won’t need to wash and that are good for storing.

the tools that you will need for this process are : a shovel or pitchfork if you grown them in the field soil or a trowel if it is in a raised bed or a container, you need to have careful attention not to harm the tubers.

how many potatoes do you get per plant:

In average you are going to get 10 potatoes for your harvest out of every plant and depending on the variety that you are growing, weather conditions and type of the soil, you can see more information about that in this article.

potato, cured, storage, tuber

4) Curing your potatoes :

Curing potatoes is is a process that is going to make the skin of your potatoes to thicken and slows the respiratory rate of your tubers which makes them less susceptible to bacteria and mold it is done for the purpose of storing them in the best condition otherwise you will end up with a bunch of rotten potatoes sitting in your basement in the end of the month.

When you harvest your potatoes bring them inside into the basement or a cool dry place in your house, inspect all your potatoes and make sure they are not cut or damaged when they where into the soil (these ones should be consumed right away), then you need to rub all the dirt from the ones that you are going to store, let them dry and store them in a cool place between 45 to 60 degree F (7°-15°c) and a relative humidity of 85 to 95 in a ventilated area away from direct light

you can lay them on top of several layers of news paper or a cardboard for 2 weeks and they are ready to be stored through the whole winter


Different places you can grow your potatoes in:

Potatoes could survive different environments and give you a generous produce, they also could be relatively easy to grow no matter where you choose to place them, if you follow few instructions :

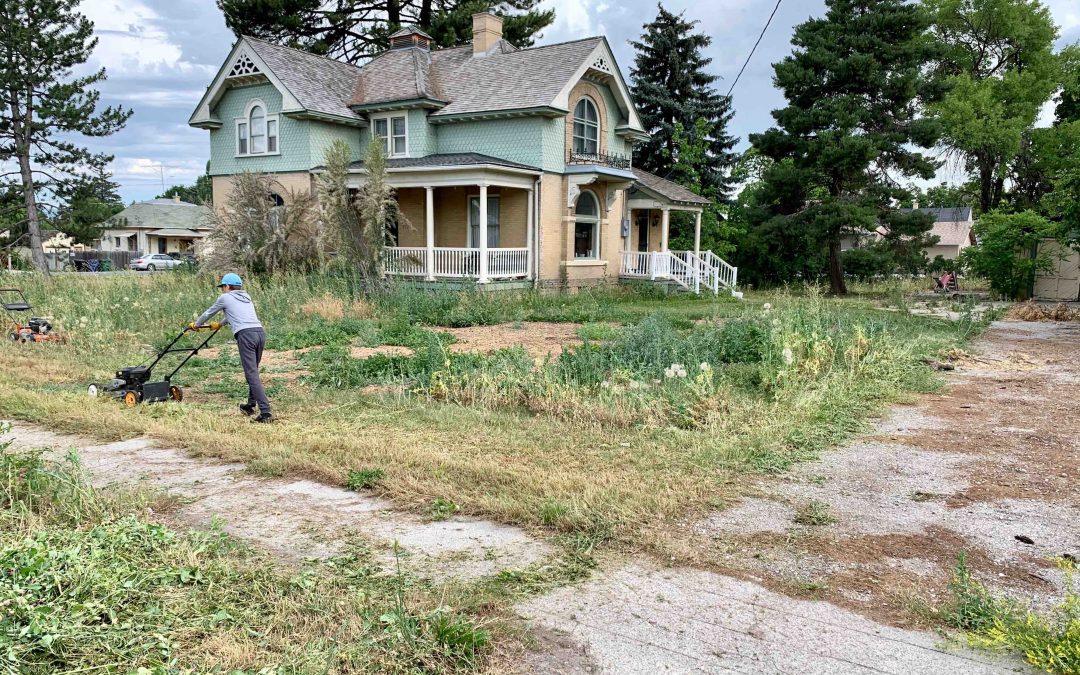
plant potato in field

The normal way, used by farmers this method which happen to get a satisfying produce will be not preferable if you have hard rocky soil that will be so difficult for the tubers to form in, also make sure not to harm the tubers when you harvest.

plant potatoes in a bag

Potatoes grow bags are made specially for an easy satisfying experience there are different forms of them but the ones with an opening on the side to take tubers are our personal favorites, because you can take the mature ones and let the small ones grow bigger, you can start with a half empty bag of soil to cover the seeds and begin adding soil after they emerge 3 to 4 times following their growth to get better produce and protect your tubers from the sun.

plant potatoes in containers

potatoes on containers tend to work really good and comparing the results you can achieve a hight volume quality harvest from them even more that when they grow in normal field soil you can see this video to see the results of the comparison

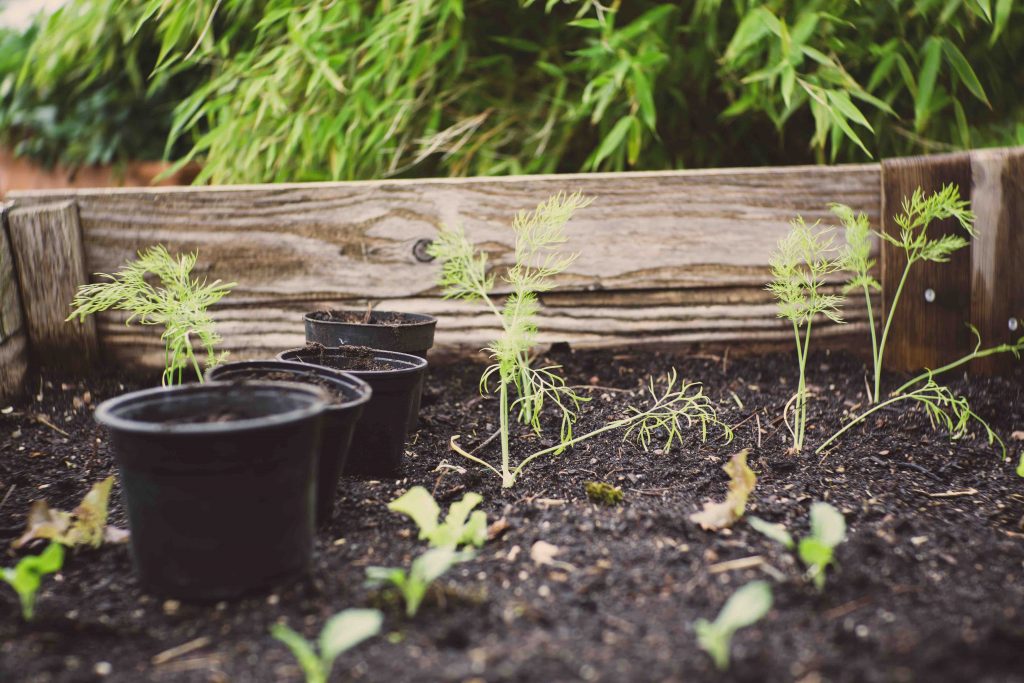
plant potatoes in raised beds

Raised beds tend to be the best option for potatoes, due to the space provided for their growth and you have the ability choose the best quality soil that will support their growth.

how to plant potatoes in a laundry baskets

Laundry baskets are a fun way to grow potatoes they have the lower space of the basket covered to retain the soil (drainage holes are mandatory in this case) and the sides hole to protect and support the plant.

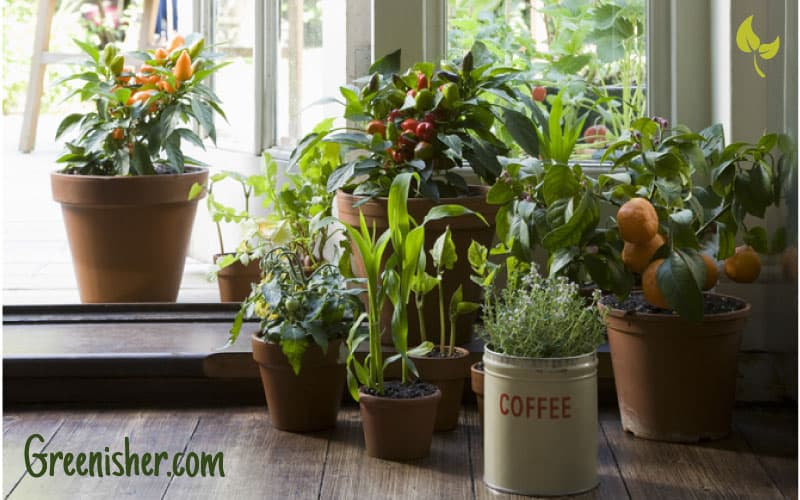
Other places you can grow potatoes in :

You can grow potatoes almost everywhere and here are some of the options : in pots, in a barrel, in a trash can, in hay, in tires… and list continue, just use your creativity and you are ready to go.


Seasoning

can you plant potatoes in the fall

Depending on the variety you have ( if it is late season or early season ) and the climate zone you live in (check this card for better info) if you happen to live in a relatively warm zone between 9 and 11 the you should be able to grow potatoes just fine, but other than the it would be preferable to cover the plants from the winter frost since those plants will have to grow for 3 consecutive months.

How to grow potatoes in winter

to grow potatoes in winter you either grow the in a green house or cover the top with a

will potato plants survive frost

most varieties of potatoes doesn’t do really well in the frost so if you know that there is a coming frost shortly after you plant them or before they achieve maturity you better cover them with some blanket or a
some varieties grow perfectly fine even during the frost but it is preferable that you cover them with mulch and if you are growing in December it is preferable that you put a winter cover


General knowledge about potatoes


The difference between seed potatoes and regular market potatoes

Most gardeners will tell you to now grow potatoes from you market store, and there is a reason for that ; because they have been grown and treated in a way to maximize storage and minimize sprouting, seed potatoes in the other hand are small crops that are disease free that are kept to sprout for planting but ahead from that market potatoes are also safe to grow especially if they already begin sprouting in your house due to high temperature weather or other factors, that will save you from waiting for your seed potatoes crop to be ready (it might take time).

how long does it take potatoes to sprout

Depending on the conditions that the have been stored humidity and warmth are huge factors to …. the sprouting ,from the time potatoes grow out of soil on average they take about 3 to 4 month to actually sprout, but the ones that are sold into the market are generally treated in a way to maximize the storage period, this is why we do not recommend trying to get them to sprout as long as they don’t do it naturally, it is preferable that you order your seed potatoes to get hight quality disease free seed ready to be planted.

Can you plant unsprouted potatoes

Yes, planting potatoes that are not sprouting is fine watering the soil will provide the right environment for them to start growing and it will push them to fasten the process (do not heavy watering them) even if you grown potatoes this year and forget some tubers in the soil you will have new plants coming out of the soil.

How to speed up potato sprouting:

you can get potatoes to sprout quickly by simply storing potatoes in a dark, warm place preferably full of humidity (you can use a sprayer and spray them with water to humidify the place ) this will create a suitable environment to hack their growth and make them begin sprouting fast. you should see the potatoes eyes (buds) appearing in about a week or two then move them into light.

Plant old potatoes

yes you can plant old potatoes even if the are not sprouting (except for the ones with diseases) , even if they won’t grow they will transform to compost and amend the soil naturally, be aware of diseased potatoes that could eventually spread the disease to other plants and make it an awful experience for you

Where to plant potatoes sun or shade

Potatoes needs to be planted into direct sunlight, 6 hours of direct sunlight preferable for their growth, a shady place could cause them problems and affect their growth so we advise you not to do so.

How to plant potatoes indoor /growing potatoes indoors

growing potatoes indoors might be tricky you will need to keep them in a place full of light from the moment the crops go out of soil or provide the necessary light for them so that they could do the photosynthesis activity, you can start them indoor and move them outdoor to continue their growth.

Is it too late to plant potatoes :

Like we said, potatoes are cool crops you generally could grow them until late fall and mild winter (warm weather zones) to get them harvested during Christmas, if you are in a zone of heavy frost make sure to plant your crops 2 months before the fist frost.

How do you maximize a potato yield?

You can maximize your yield by planting good varieties , providing good quality soil, exposing it to the sun for at least 6 hours a day and watering it frequently , make sure the plant isn’t facing any sort of disease or insect

Plant potatoes roots up or down

You can plant potato sprouting in any position you want, But it is preferable to put them to the top because their growth is not in one way direction they follow the direction of the sun and light to go to the surface of the soil.

potato companion plants

companion plants for potatoes

potatoes are heavy feeders so it is preferable that you plant them alone

Now it’s tame to answer some different types of questions that maybe not a lot of people thought of but why not …

potato plant flower / potato flower / potato plant flowering


Are potato leaves poisonous

potato leaves aren’t poisonous and there are edible for most varieties
there is a myth that in the late centuries with the discovery of potatoes the leaves were king’s food and the slaves where the ones eating the tubers

growing roses in potatoes

this pratique is generally seen in some viral facebook videos might be genuine in a way that potatoes transform into compost to amend the soil when it decomposes but you might sendup getting some potato crops with the roses which is not something you intend to do I guess, so I will prefer growing roses in another more practical way than that , I will recommend checking this article for more information

is a potato a root

indeed, potatoes are considered roots because they tend to grow inside the soil

is a potato a tuber

yes they call it a tuber or a root and this is because

is a/ are potato a vegetable / fruit

potatoes are actually not a fruit

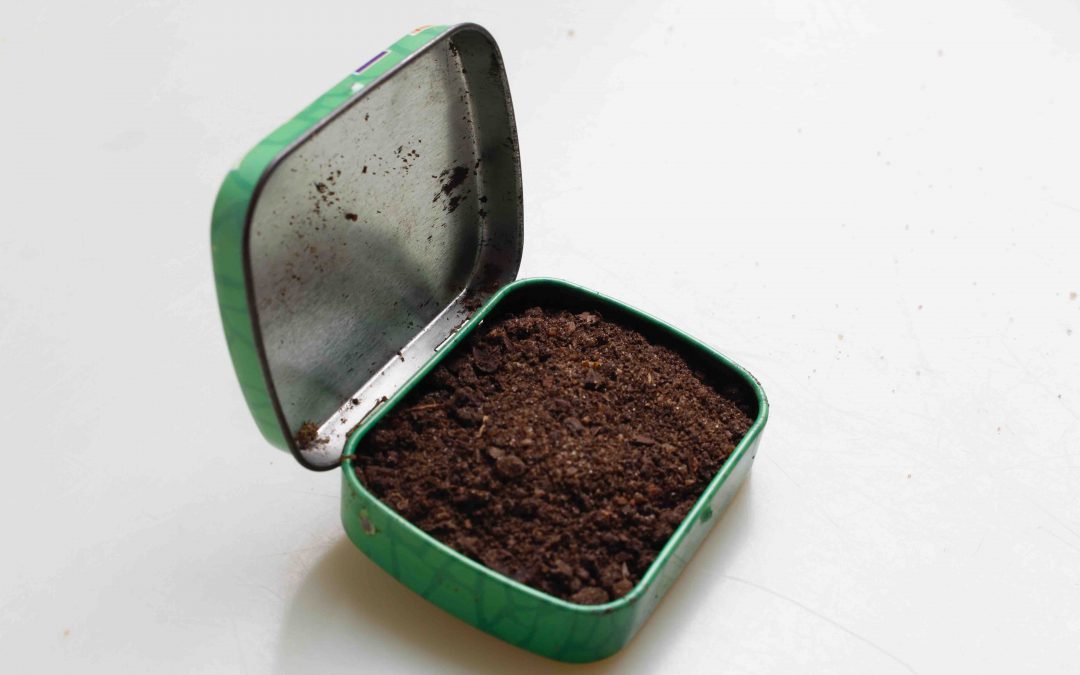
Are coffee grounds good for potatoes?

coffee grounds will decompose to create compost for the plant and this will be beneficial for the plant but the aren’t going to be a changing factor for your yield, we prefer creating out own compost and amending the soil with high quality nutrients for the potatoes to find all that they need to strive

How many potatoes should I plant for a family of 4?

for this question we brought to you an awesome calendar that is going to give you all the plants calculation to grow exactly what you need , click here 

growing yukon gold potatoes

the response to this question will be provided soon

growing potatoes in straw / growing potatoes in straw bales / growing

potatoes in containers with straw

yes you can grow them this way and get a really good produce.

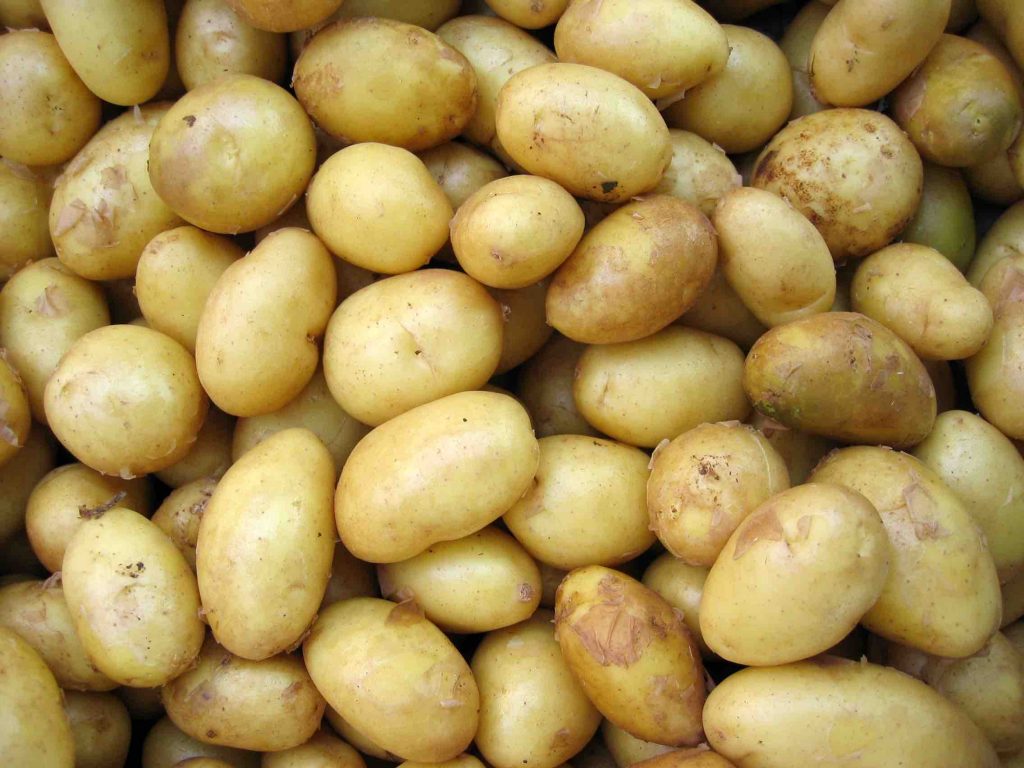
what does a potato plant look like / what do potato plants look like / potato plant pictures:

we have the picture in the beginning of this article, go there and see it

you can see much more article like this one about other vegetables on our blog 

Red ginger plant care and benefits

Red ginger plant care and benefits

what is the scientific name of red ginger ?

The scientific name of red ginger is : Alpinia purpurata

Red ginger belongs to the Zingibera ceae family (ginger) and is also called by these common names : Jungle queen (this is the female and it has pink flowers), jungle king (male has red flowers), the wild has Deep red inflorescence, Tahitian ginger, Ostrich plume, pink cone ginger and it Hawaiian name is : Awapuhi – ‘ula’ula

Origins of this plant

This plant is a tropical plant and is originally from Malaysia , it is also the national flower of Sumoa “Tanila” , A really popular plant in Hawaii and it is considered as an invasive plant in the Hawaiian forests.

What are the benefits of red ginger ? red ginger facts

There are many studies that confirm beneficial effects of red ginger against the symptoms of diseases, i.e. anti-inflammation, antioxidant, antiemetic, antibacterial and antidiabetics. Although the medicinal properties of red ginger have been known, further trials in humans are required to determine the efficacy of red ginger (or one or more of its constituents) and to establish what, if any, adverse effects are observed. Source

Is red ginger edible ?

Although that are some people who actually ate and complement the strong flavorful taste of the red ginger (the roots) but real studies didn’t achieve the point to say that this plant variety of ginger is actual edible so the real answer is : it is not preferable.

what is red ginger good for ? red ginger uses :

This plant has two main component that are used in totally different purposes :

Red ginger root utility

Red ginger is known for it’s rich oil and the strong fragrance properties combined with many health benefits which make it a central component that is generally used on cosmetic products

Red ginger flower utility

The beauty of it’s flower or let’s call it is a floral bracts which are actually leaves that assemble in the top of the plant (the real flowers of this plant are in fact small white and are located on the tips of those floral bracts they las for almost 25 days ) due to the nature of these floral bracts they bloom all year long (evergreen) and will make it a central piece of your garden adding colors and will make it one of it’s kind some people cut them and use them as arrangements

red ginger plant flower

How to grow red ginger plant ? red ginger plant care

Red ginger is relatively easy to take care of, you can grow it in your garden or in a container or a pot in a rich high drainage soil, it is preferable that you enrich the soil with high quality fertilizer each month to achieve constant growth and vivid colors of the plant the PH should be around 6 to 6,65 and water around 1inch each week

This plant could grow 5 ft and beyond could achieve 8 ft inn some cases and support growing in full sun or in the shade also you can grow it indoor or outdoor at one condition is that the temperature of the soil should not go below 45 f otherwise the plant will die, if you live in the zones between (9b to 11) you should be fine growing it outside.


How to propagate red ginger ?

You have to ways for this operation either to take the seeds that are rarely produced by the flowers and sow them into hight quality sowing soil or cut the rhizome of a piece of ginger let it in a dry place for 8 days and plant it in a rich well amended soil

How to successfully plant red ginger from seeds

If you happen to have seeds of red ginger from a plant which are rarely produced or by buying them you can follow these instructions to succeed growing them :

  • Put those seeds in a hight quality sowing soil preferably indoor or cover it to keep the humidity in
  • water them constantly until the plant appears
  • when the plant start growing move into a container to be able to move inside to protect it from the frost
  • it is preferable to help it grow by adding a fertilizer each month and watering it around 1 inch per week
  • place it on a bigger container or move it to the soil if it is necessary
  • prune it regularly

How to prune red ginger ?

It is preferable to prune this plant frequently to achieve full maturity and you can do that following those steps:

  • Grasp the base of the stem with the dead or dying blossom.
  • Use pruning shears to cut the stem off near the base of the plant
  • Prune these stems continuously throughout the year each time a bloom fades.

Red Ginger plant stems only produce one blossom that stays for a long time, so pruning these off makes the plant more attractive.

How long does it take to get the red ginger flower ?

Depending on how you planted this plant in the beginning you can see the flower starting to bloom early planting it from the rhizome ( it will take around a year to achieve this point) on the other hand if you planted this plant using seed you generally have to wait around 2 years to have a fully grown flower.


make sure to leave a comment if you are planing to grow this wonderful plant and visit our blog for more awesome content like this

Vinegar and Salt weed killer

Vinegar and Salt weed killer

Weeds, soo much annoying yet really tiring to pull each time , well today we are going to end this suffering and for that we present to you our ultimate Vinegar and salt weed killer (tried and approved), so the question is How to make the vinegar recipe to kill weeds in driveway, lawn or even between pavers ? so a short to the point answer to this will be :

You need to have 1 gal (3.75L) white vinegar ( 5% everyday household vinegar is fine ) add a cup of salt to it stir until it dissolves then add 1 table spoon of liquid dishwashing soap (optional) and then spray it on the weeds in place on a sunny day, you should see results in a week or less.

And now let’s get into the details and answer every question you might ask yourself , here’s a video to help you see a real application :

How to make this vinegar and salt weed killer ?

if you want a no residual action you can apply only vinegar on the weeds and it is going to kill some weeds but they will come back after a short period of time, mixing it with the salt is the way for definitive long term results, weeds will never come back (or will take a lot of time to do so) and all that is eco friendly and you won’t have to worry about any chemicals or else , completely natural and with a minimum risk and it will kill weeds even in the rocks.

What will the vinegar do ?

depending on the concentration of it 5% vinegar vs 10% and 20% will all make effect and we found out that it will just take more time with the 5% compared with 10% or 20% but it still going to do the job perfectly so if you have 5% vinegar available there is no need for stronger solution.

What will the salt do ?

Salt will add to the effectiveness of the vinegar and they will work together to dehydrate the plants and bun them in the sun, we suggest to not be close to this formula and it’s preferable not to do it in a close space or indoor for your security and saftiness.

Why the soap ?

well you might be asking yourself, now that I now that vinegar and salt are the component who are going to kill the weeds, what’s the role of the soap ??
Soap will make sure that the solution is going to stick to the plants for long enough till they eventually die and disappear.

How to apply this weed killer only on weeds ?

To apply this correctly you need to put it into a normal sprayer if you’re going to be doing small parts application or a garden sprayer that you might find in the links, spray on all the weeds you want to get rid of and it will start to take effect on them.

How long will it take? and is it definitive?

It will take between 3 days to one week (in good sunny weather) to make the whole effect and kill all the weeds that you sprayed the solution on , yes this should keep your driveways and pavers free from weeds for a decent amount of time and they will not comeback anytime soon.

Will vinegar with weed smell ?

Vinegar and salt might might smell a little bit, try to stay away and do not expose yourself to this smell if it is on close doors try to aerate the space properly.

what about other plants or vegetables is it going to kill them ?

Yes, this solution will make effect on any sort of plants so we suggest not to apply it where you want the plants, vegetables or the grass to grow, only on places where you do not want any type of plants.

How to get rid of weeds in where I have plants ?

Like we said this solution is going to kill every plant that apply on, so if you want to kill the weeds that encircle your growing we suggest:

  • take them up manually
  • surround the bottom of the plants with mulch

this will help you limit the weeds and provide good moisture to your plants.

How to protect yourself from this weed killer ?

keep your distance from this substance apply it on the parts that you want to clean, aerate the space if it is on close doors and keep your safety a priority.

warning

The vinegar and salt homemade weed killer might be effective but might have some other misdeeds try to stay at a distance from it and if you make any contact with the eyes consult a doctor immediately.

Disclaimer

Anyone desiring to use a vinegar weed killer should be aware that the results they get will be quite unpredictable. It would be wise to try sampling before using any formula on a broad scale.

Vinegar weed killer can be found in a few products made by garden suppliers, but they have to meet certain regulatory guidelines before they can recommend using vinegar as an herbicide. This is for consumer protection, Don’t blindly accept the recommendation of anyone on the internet, or other sources saying vinegar weed killer is safe, natural and effective. It might be in some situations, but not in others, it all depends. There are so many variables.

Use your best judgment. You’ve learned here the basic factors that should help you decide if it is a good idea to use a vinegar weed killer in your situation.

sources

what about other commercial alternatives ?

most of the commercial alternatives contain chemical substances if you are interested in those types of product consult the link to see the alternatives and learn more.

Is there any other Home made alternatives for this ?

yes there are other home made alternatives that works also, we saw that this one works best if you want to see other alternative solutions make sure you let us know in the comment below and we will review it as soon as possible, visit our blog for more content like this

Do you have to change compost every year ? what to do with the old one

Do you have to change compost every year ? what to do with the old one

One of the things that usually comes to my mind when planting in containers, pots or in raised beds is if the soil still contains the right nutrient for the plants to grow and give good produce, do I have to change compost every growing season ? or maybe can compost be recycled and reused ? or is it possible to add more to it and still be okay? for that we have analyzed all the possibilities that came to our minds to give you an honest response to all of these questions :

Do I have to change compost every year ?

Depending on the plants that you are growing are they heavy feeders (tomatoes, pepper …) or not , the actual mix that you are using and the size of your growing space but as a rule : compost nutrients will be majorly consumed in the end of the growing season, you need to change it with new compost and use the old one for a different purpose or revive it. 

Now let’s watch this video and go into much more details below :


What will happen if i leave the compost for too long?

Even thought the compost will continue it’s degradation phase for long after being used as a source of nutrients  but most of it’s components will be used by the plants during one growing season and if you keep using the same over and over without any added resources your plants are going to suffer from a lack of ingredients which will limit the growth of them making it easy to catch diseases and won’t be able to produce the healthy veggies you’re used to have, they might even grow and don’t give you any produce.

How to revive old compost ? to use it again.

Image showing two people reviving the compost and adding nutrient

there are several ways you can revive the old compost and use it in different forms in your garden but before you can do those, you have to make the necessary check to make sure you are not harming your new plantation :

Make sure that your compost isn’t infected : ( do a check )

Disease are really harmful to your plants especially the new planted seedlings, if your precedent plant have died from some sort of diseases or it has been infested with insects then this should be a sign that your compost might be also infected so make sure it doesn’t have some harmful insects or escargots in it.

if it is in perfect condition and just has a lack of nutrients, begin by removing all sorts of roots that must stick in it
(this might be a good chance to verify if some sort of insects or fly has been hidden inside of it).

Introduce some nutrients to it :

There is two main ways to do that :

You can mix the old compost with new freshly produced compost, and they should work fine providing the right nutrient for the plants, as we said even the old compost is still decomposing but in a slow pace so mixing it with a ratio of 50:50 should make a great resource for the plants during their growing cycle.

You can add a balanced fertilizer to your old compost to reintroduce nutrients to it (make sure they are slow release organic fertilizers) read carefully the instructions on the fertilizers because you don’t want to over feed the compost and that could damage your plants.

In what frequency should I change compost ?

this will depend on the surface you are planting in if you plant in a large field separa

ting the plants from each others  or growing heavily in small size containers with a limited soil, you know your garden best but generally in both sides try to add some nutrients in order to get satisfying results

Should I change the compost for my indoor plants ?

pots near new plants , planted in compost

For indoor plants, changing the compost to revive the soil is favorable for the plants to grow more and improve their health , you can do this operation once a year for potted plants but try not to shock the plants by removing all the soil from it which will kill the plant, you can do this operation by moving the soil in the pot and adding a extra layer of new compost, most indoor plants aren’t heavy feeders so this should be fine.

How can I recycle compost that is no longer usable ?

If by now you judge that your compost if fully used and it doesn’t have much of nutrients, there are other ways to recycle the compost and still make use of it :

  1. you can use it as mulch : compost has the ability to store water and could be a great resource
  2. cover your garden from the frost with it
  3. use it in parts of your garden that doesn’t need much nutrients

Can I reuse compost from my diseased plants ?

if your compost is tired and begin to catch diseases it’s preferable to get rid of it and do not use it again, because it’s doing to cause you problems and won’t be easily fixed, so we suggest putting it aside from your planting.

Is the compost good for preventing diseases ?

Compost contain some good bacteria that help decompose it and are good for the soil but compost isn’t a cure for plant diseases, it can prevent the plants from catching diseases simply by providing the necessary ingredients for them to grow healthy and be able to resist and face those obstacles, but if the plants are catching some sort of diseases there is no point on putting some compost trying to cure them, it’s a waste of resources and it isn’t going to work.

To summarize it all :

  • Using compost for too long could make your plants suffer from a lack of nutrients
  • Before trying to revive your compost , make sure there’re no diseases or insects that can harm your plants
  • you can revive it by either mixing it with new compost or introducing balanced fertilizers
  • if you have taken all sorts of nutrients out of your compost and doesn’t want to add fertilizers you can use it as mulch and cover your beds from the frost
  • you can add layers of compost to your pots and bring up the necessary nutrients for them
  • compost from diseased plants isn’t usable
  • compost isn’t a cure for plant disease it just make them sufficiently healthy to face it.


If you want to know the best technique to make good quality compost on your own check Our Ultimate guide on composting HERE

Do you have Maggots in compost ? then you should do this

Do you have Maggots in compost ? then you should do this


As much as I love making compost and it happened that am composting in a bin, last time I noticed some weird White worms in my composting bin, I thought my compost just went wrong and it isn’t working but after taking the time to learn about them I discovered that they are just Maggots and they are not that bad so here’s an article to take you throughout my discoveries.

What you should know about Maggots in your compost ?

Maggots in compost are actually beneficial in most times they eat your scrapes to create compost for you but, if it happens that you are already putting red worms (red wigglers) to do the job, in this case you’re not providing the right environment for them to perform, it’s also a sign for you that your compost has achieved a high level of moisture and you need to put more browns (carbon materials) to make a good ratio  and you’ll notice them disappear gradually

If you want to know more about them here’s a video to explain everything you need to know then we’ll go deeper in the article below :


Where does maggots originate from :

Maggots are fly larvae, usually of the common housefly and also the bluebottle. Flies are attracted to food and other rubbish to lay their eggs, later with the right worm temperature and environment the eggs transform into maggots and get nourished from the food waste they happen to be in.  so you are only going to have them if flies can get to your waste land for that you should limit the flies accessibility to your compost but it isn’t something obvious since you are doing compost outdoor most likely in a pile or a bin and so other than protected bins , you are going to get flies on your wastes and if you’ve ever gone crazy trying to swat flies in your kitchen, then you already know exactly what causes these maggots to show up in your compost.

you could prevent the eggs from hatching into maggots if you keep the ratio of the greens to browns at about 1 third (approximately 70% brown and 30% green) and not too much moisture this way you’re not providing them with the right environment to be in and they likely won’t come.

also if you are keeping your compost still and isn’t aerating it frequently you are much likely to have those maggots in it, they support living in a low oxygen environment more often

Are maggots going to cause any problem for my compost or my plants :

Like I said earlier maggots are not going to cause any problem for the compost itself except for some odor that they are going to create and it may cause a problem for people doing their compost near the house or even inside.

the maggots appear in an early phase of composting in the begging of the process and if you decide to keep them, they are going to transform into flies in the end of their development case to leave your compost, when the compost is ready you won’t find any sort of maggots in it because it isn’t the right environment for them to live in so your plants won’t even have to face them.

How to get rid of them

the good news is you can get rid of them easily , you have to put more carbon materials to your compost until you reduce  the moisture of it , because it is one of the most definitive factors for them to appear.

to speed up the process you’ll also need to put some lime combined with eggshells in your compost pile to hight up the acidity but be careful of PH because it could go really high which might be a problem for your plants, from my experience I just put some pieces of used lime scraps because we use a lot of it and it did work, I heard that some people use 1 cup of lime per 25 cu ft. of compost and it also works perfectly.

Aerate your compost frequently buy turning your compost bin if you’re using one that has the turning functionality, move it and mix it with a Pitchfork or a Scoop Shovel or you can just move it from one location to another as a way to aerate, also you can be using an aerator that works perfectly as a way to achieve deep levels of the pile without moving it.

You can give them as food for your chickens and they will adore them it isn’t a way to totally finish them if you intend to do so but it’s a way to make the best use of them, some gardeners even produce them to feed their birds fishes and some other pets like lizards or sell them to pet stores as food.

how to avoid maggots from the beginning

You can avoid getting maggots but making sure that you are making your compost the right way using the right ratio to keep it clean and achieve the most satisfying results for that I advice you to take a look at my Composting Guide an all included article the takes you through all the necessary steps for a great result click here.


The complete guide to containers gardening

The complete guide to containers gardening

One of the most therapeutic hobbies. Gardening is said to be not only a good exercise for the body, but also a good source of sense fulfillment, and obviously, an opportunity to contribute in your own way, to advocate the importance of nature.

With that being said, Gardening is not limited to those who have large gardening fields with some knowledge you can grow trees in pots and get fruits, you only need to recognize the needs of a plant.

In this blog, we are gonna provide you with tips and technics to master your container gardening that might help from the beginner to the expert. 

h

Table of contents

$

Why should you start container gardening ?

$

Decide on what you would like to grow?

$

Do I need fertilizers or compost?

$

What should I Grow in containers?

$

Bonus tip

Why you should start container gardening right now?

Numerous reasons keep container gardening our top priority, that made us create this blog, here are some reasons to garden using containers that will give you a dose of motivation to start:

It is the easiest form of gardening.

If there is one type of gardening that can be best recommended for beginners, that’s container gardening. Even at a young age, kids can be enabled to start appreciating nature through plants, if given the chance to plant in a container. Adults are more likely to master it. Creating a container garden can be argued to be achieved easiest and fastest, that all you need are the usual seeds (or plants), the appropriate soil, and the container.

Its portability feature is superb.

The very good advantage of planting in containers is that You can grow your plants anywhere you want, as long as there is adequate sunlight (or its alternative), along with water. It is good for people who love rearranging the house or the front yard, who love the variation in the layout of what he or she sees.

It has the capability to adjust.

Plants have preferences too. There are plants that grow well in one part of the earth, while others prefer to say small in another. Bonsai plants usually grow in high altitudes for instance. But by using containers you can bring them to your living room and maintain them wherever you want to as long as you control the environment in which you place them. It is a matter of milieu modification to make things work. This is the power of portability.

It could be cheap.

You might be thinking that with the requirement of a container, there is an additional cost, compared to just planting the seeds at the backyard. Containers may be chosen to be in pricey forms, but this is just an add-on. A container can be anything you do not even have to buy. You can utilize an old jar or bucket, an unused bin or tub; just anything that you can fit your soil in, after putting some drainage holes under it.

It can accommodate almost any plant you want.

It is believed that there is almost no plant you want reasonably, that cannot be grown in a container garden. You can grow vegetables, ornamental plants, herbs, or even trees – of various sizes, to make it even more interesting.

This list will never stop growing in length, it’s up to your creativity and ability to Break new ground. 

Decide on what you would like to grow?

In choosing what to grow, you must specifically consider your time, your lifestyle, and your needs, as these define the extent of commitment you can give your garden. For example, if you want your pots to be decorative In that case, you pick ornamental plants. However, if your idea of a hobby is simple being happy-go-lucky, with no commitments, just come and go, it’s either you think it all over again or choose low maintenance plants to grow in your pots. In this way, you only have to water them once in a while.

Many container gardening enthusiasts choose to grow what they need in the kitchen. Also, several of the kitchen experts are now growing their herbs in their very working area. This is probably a good way to combine your passion with your work towards pleasurable functionality. For these people, good and common options for container gardening include certain herbs, lettuce, and cherry tomatoes but like explained earlier, you can grow whatever you like.

Do I need fertilizers or compost?

compost versus fertilisers

Fertilizers are needed in keeping the soil able to nourish your plants, thus they are always part of your gardening essentials. It is critical to maintain the level of organic matter in the soil, from where your plants grow, which cannot go too low on the nutrients.

Fertilizers can vary from organic to synthetic fertilizers. Some gardeners even add sand or clay to their soil to balance it out. But most of the time gardeners add a different substance that brings balance and fertility to any soil types of soil which are organic matter.

Organic matter is anything that was once living, whether plant or animal. It is what feeds the worms and microbes that make soil come alive like leaves, kitchen scraps, and manure. In other words, compost. Here you can find step by step guide to composting.

The other good things about organic fertilizing are that it could be really cheap and that it has long-term and stable effects on the soil, as opposed to the synthetic type of fertilizers. Such steady longer effects make it even more suitable for container gardening, as you will not likely have to till the soil as you are to do that in ground gardening. 

On the other hand, you have inorganic fertilizers that are made of chemical substances supplied to the crops to increase their productivity. The fertilizers contain the essential nutrients required by the plants including nitrogen, potassium, and phosphorus. They enhance the water retention capacity of the soil and also increase its fertility.but the miss-use of that chemical substance can lead to some serious issues considering that they are most of the time toxic and can lead to killing your plants and soil if you miss-use them. we recommend using compost instead.

Load The Container Properly

When filling in container, composted soil is placed at a height of two to four inches. If you are planting sprouts, then you should give them a few inches of space around the roots. However, scattering the seeds even across the platter will do the job if you are planting seeds. One suggestion to be more practical with growing herbs is to keep two or three containers of each plant going at once, so that when you’ve clipped one plant, you will have another one ready to keep you covered on your next meal.

If you are considering grouping various plants in one container, remember that the plants should have the same needs on the amount of water. Therefore, they must be planted in such a way that their roots are not on the same levels, and that those that should be driest are closest to the surface.

Tomatoes, however, are easy to over-water. So before watering them you should check the soil. If the soil is moist, then wait till the moment when it becomes dry and only then water. It is best to water around the base of the plant, rather than through the leaves.

When it is time to harvest from your plants, you would want use the apt scissors to snip the leaves or vegetables. In order for you to do this, clip the leaves around the base of the plant first, so that it will continue to grow and fill out. You may now enjoy the freshest herbs you could ever get, and that is straight from your very own container garden. Rewarding as it sounds, it would feel better in reality. 

What should I Grow in containers?
different vegetables you could be growing in containers

Tomatoes.

As always, the right container size is crucial in growing tomatoes. So is such consideration essential in growing different variants? To grow the smaller variants of tomatoes, containers with around 6-liter capacity at the least are advisable, while for the larger ones, a minimum capacity of 10 liters should be used for one. A high recommendation is given by experts on growing cherry tomatoes instead of the big ones, as they more easily grow and ripen, giving you the best of what you may need from the crop. Varieties of vince cherry tomato you might want to include are black cherry, gardener’s delight, sungold, and sun cherry premium, while some examples of dwarf bush ones are minibel, micro tom, tom thumb, balcony red, and balcony yellow.

When preparing the pot and the soil, remember that the roots of tomato plants need to breathe. To facilitate this, you may add around 15% of perlite in your growing mix. Also, you may create small holes on the sides of the pot so that the roots receive a sufficient supply of air. Aside from holes on the container, support may also be provided for bush tomatoes with the use of stake or strings. The watering technique is also important. What to keep in mind is to saturate the entire area of soil you can see; otherwise, you are merely wetting the topmost layer. Other than watering, an important way to keep the tomatoes growing is feeding it with compost or tomatoes feed. You may dilute the tomato feed with double the amount of the recommended water, so you can distribute the feeding into an increased frequency, and less quantity in each feeding. Link to tomatoes feed

Herbs.

Herbs are preferred by many to be grown in containers, not only because they look stunning in those pots, and they are easy to access and move when cooking, but also because they are much easier to manage and to make the most out of when they are grown there. Examples of herb that can be grown in pots or similar containers are Nasturtium, forest green parsley, Genovese basil, lemon balm, and lemon thyme.

Herbs always offer the closest thing to instant gratification in your garden. They are among the easiest edibles to grow, and you can start harvesting little snippets of seasoning almost right away

A small number of herbs are summer annuals (basil, dill, and cilantro being prime examples). These mature quickly and can be planted every 30 days to ensure a fresh supply: heat-loving basil and dill in the warm months, cilantro in spring and fall. But most herbs are low-maintenance perennials including rosemary, sage, thyme, oregano, lavender, savory, chives, tarragon, mint, and fennel meaning you can plant them once and harvest for years (parsley, a biennial, lives for two growing seasons). Some herbs, such as rosemary, can grow to the size of an armchair, but if you’re short on space, you can pack several different perennial herb seedlings in a single-window planter and they will grow just fine, albeit dwarfed.

Window planters are Ron’s favorite places to grow herbs. For convenience, install a few in your kitchen window. “You can cut [herbs] right there when you need them,” he says. This is a garden that nearly anyone can manage.

Legumes 

Like greens and herbs, legumes grow vigorously with minimal effort. English peas and sugar snap peas like the cool weather of early spring while most beans should not be planted until mid or late spring when the weather warms up.

Most beans and peas grow on a short vine and require a trellis, The options are endless, and the vines are light and short-lived, so you don’t need to worry about building something sturdy or permanent. The most important thing is guiding little legume seedlings toward the bottom of the trellis (once they’ve latched on they will pull themselves up). Alternatively, plant “bush beans,” which have been bred to grow in a short, stocky shape, eliminating the need for a trellis.

extra herbs

Lemon balm, a lemon-scented herb is a fast-growing plant, is best grown in a container, as it could overtake whatever space is reserved for it. In growing this mildly sedative herb, seeds are sown indoors for six weeks before the last frost and are lightly

covered with average, full-drained soil. To keep them bushy, you may cut plants during the growing season to provide your kitchen with fresh foliage for different recipes.

Lemon thyme, known for its intense lemon aroma, is best grown in the full sun within average-well drain soil. Similarly, with lemon balm, this herb could appear rather messy on the ground, so its best to be grown inside a nice container, from plants, and not seeds. Lemon thyme must hibernate outdoors, and be trimmed back to its livelier form during spring. You may cut back its stems to trim during the growing season.

Generally, in harvesting herbs, as the rule goes, the more you pick, the more you’ll get. When you keep pinching most of those healthy plants, you help them become bushier, thus prettier.

Bonus: Helpful Tips


Now if you are deciding to grab some pots and selecting some seeds and plants and soil, it is also important that you know some dos and don’ts, which can help you enjoy your experience in container gardening. Others have made mistakes; you cannot afford to repeat them. Others have paved the way to your success; learn from them.

Plants drown too;

keep them safe. Water is good for plants; that’s a fact. Water is good for you too; in fact, it is a necessity. But hyperhidrosis is something you do not wish for yourself. While you are trying to keep yourself hydrated, you only do so in moderation. Your plants can drown too. If you over-water your plants, their green leaves may fade to yellow, and your plant turns weak. Before this could even happen, pay attention to your soil; it may be too wet. In this case, adjust by transferring the container to a spot where the soil can dry a bit, just enough not to completely dry them out. know how much you should water. Different plants have relatively different needs pay attention to not dehydrate them, In order for you to know that you are watering enough, make sure you see the water above the surface of the soil, and not merely allowing the former to just wet the latter at the topmost layer.

Keep your garden disease-free.

When buying plants, stay away from those that need resuscitation. Choose healthy ones. When some parts of your plant fall off, make sure to take them out if it does not qualify as compost. It may infect the entire plant/plants in case you mistakenly commit this. Also, keep your plants away from weeds, pests, and animals. Although you grow your plants in containers, there are still chances for your plants to experience this, so just in case you see some little crawling beings, simply yank it off to keep your garden clean and nice. 

Stay away from frustration.

Consider your lifestyle when planning to start maintaining container gardens. Is this something you can put your commitment on? Do you have time for it? Think of this endeavor as a commitment. Can you manage to keep up with it possible demands this may ask of you? In cases where you need to leave without prior notice do you have a plan of action while you are away? In case you travel a lot and leave the house most often than not, there are solutions to your dilemma.

First solution:

you may either go for an automatic drip irrigation system. Drip irrigation is said to be the most effective method of irrigating, much more than sprinklers. This drip system is said to be very convenient because it not only wastes much less water, it is also said to be easy to install, easy to design, and able to reduce the disease of plants brought about by a certain level of moisture of the soil. The mechanism of this type of irrigation lies in that the water soaks directly into the soil prior to it can run off or evaporate. Another mechanism showing its efficacy is that the water is applied only when needed, rather than spread everywhere. Perfect for your potential away-from-home concern.

Second option:

to solve your problem in case you cannot be home to water your plants is the use of self-watering containers or sub-irrigation is said to be a method of irrigating your plants in which the water is accessed from the bottom, allowing the water to soak upwards towards the plant through what referred to as called capillary action

These solutions, especially the second one, are actually feasible approaches, but in case they seem to be too expensive for you or not doable for you, you can always choose plants that do not need as much water to survive. It’s your choice. 


Get your guide on how to create compost now, u know why you should? cause your plants will love it.

Don’t forget to drop a comment down here to let us know what are you planning to grow on your containers


Get our guide to create the black gold now!!

    We respect your privacy. Unsubscribe at anytime.

    Powered By ConvertKit