We all love gardening and one of the best experiences are reading a book watching your plants swing in the background for this we made a list for you gardeners to upgrade your skills on different topics and ways to garden , have fun.
Does this sound like you or someone you know? Give yourself a pat on the back because admitting you have a problem is the first step to recovery. And lucky for you, you can easily turn your brown thumb into a green one with the help of Plants You Can’t Kill.
The plants in Plants You Can’t Kill have been vetted by an amazing and famous panel of horticulture experts (this is just a fancy way of saying they went to college for gardening), so feel confident you’re not wasting money on yet another gardening book. These plants will actually survive your well-meaning, yet sometimes neglectful ways.
You had one job: watering your new plant. But it’s been a week and it’s already dying.
Fear not! This helpful guide is here to show you how to rescue your plants. Follow the survival tips outlined in this book and you’ll be on your way to having your home brimming with green life.
It’s a whole new world of houseplants, so make yourself at home in it! If you love the idea of keeping houseplants, but struggle to care for them, you’ll find solace and invaluable advice in this comprehensive guide from expert gardener Barbara Pleasant. Even experienced houseplant enthusiasts will benefit from Pleasant’s expansive knowledge of indoor gardening, which includes personality profiles, growing needs, and troubleshooting tips for 160 blooming and foliage varieties. Create a greener world, one houseplant at a time.
Gardening activities and basic to teach your kids:
Plant a pumpkin seed with a child, and cultivate wonder. This simple act of reconnecting with children with nature is Sharon Lovejoy’s purpose and joy and gift. Author of Sunflower Houses: Garden Discoveries for Children of All Ages and Hollyhock Days: Garden Adventures for the Young at Heart, Sharon Lovejoy is a nationally known garden writer whose books, television specials, and projects at her learning landscape in California have introduced thousands of children to the pleasures of gardening
In her newest book, Roots, Shoots, Buckets & Boots, she presents 12 spirited, easy-to-implement ideas for theme gardens that parents and kids can grow together. Illustrated throughout by the author’s own lyrical watercolors, each garden includes a plan, the planting recipe — seeds, seedlings, and growing instructions spelled out step-by-step — and activities.
Discovery Walks teach kids how the gardens work, and a chapter on gardening basics includes a child-friendly 10-Minute Plan for planting and maintenance, plus a list of the top 20 plants guaranteed to make gardeners out of kids.
Compost Food Waste, Produce Fertilizer for Houseplants … Garden,
For more than three decades, this best-selling guide to the practice of vermicomposting has taught people how to use worms to recycle food waste into nutrient-rich fertilizer for houseplants or gardens. Small-scale, self-contained worm bins can be kept indoors, in a basement, or even under the kitchen sink in an apartment — making vermicomposting a great option for city dwellers and anyone who doesn’t want or can’t have an outdoor compost pile. The fully revised 35th anniversary edition features the original’s same friendly tone, with up-to-date information on the entire process, from building or purchasing a bin (readily available at garden supply stores) to maintaining the worms and harvesting the finished compost.
This book can be also used as a mean to Educate Kids and Family about this beautiful process of nature and to show them the beauty of our mother nature.
The biggest mistake gardeners make each season is starting out too big and then quickly realizing their large plot requires too much weeding, watering, and backbreaking labor. Vertical gardening guarantees a better outcome from the day the trowel hits the soil—by shrinking the amount of “floor” space needed and focusing on climbing plants that are less prone to insects, diseases, and animal pests.
Notable author and gardener Derek Fell has tried and tested thousands of varieties of vegetables, flowers, and fruits and recommends the best plants for space-saving vertical gardening. His grow-up, grow-down system also shows which ground-level plants make good companions underneath and alongside climbing plants. Best of all, many of Fell’s greatest climbers and mutually beneficial plants are available in seed packets in every local garden center.
With a mix of DIY and commercially available string supports, trellises, pergolas, raised beds, skyscraper gardens, and topsy-turvy planters, the vertical garden system reduces work, increases yields, makes harvesting easier, and can be practiced in spaces as small as a container or a one-by-four-foot strip. Vertical Gardening features 100 color photos of the author’s own vertical methods and showcases beautiful, trouble free perennials, shrubs, vegetables, annuals, and fruit perfect for this new, rewarding way to garden
Since Square Foot Gardening was first introduced in 1981, the revolutionary new way to garden developed by Mel Bartholomew has helped millions of home gardeners grow more fresh produce in less space and with less work. Now, based largely on the input and experience of these millions, the system has been even further refined and improved to fully meet today’s changing resources, needs, and challenges.
With over 150 new photos and illustrations, this new edition makes it easier than ever to achieve nearly-foolproof results in virtually any situation: 100% of the produce; 20% of the water; 5% of the work.
Perfect for experienced Square-Foot-Gardeners or beginners, the original method created by Mel has not changed in any significant way with this new 3rd edition of All New Square Foot Gardening. It remains: build a box; fill it with Mel’s Mix; add a grid. But along with the classic steps, you will find some interesting and compelling new information, such as:
Adding trellises and archways
Substituting with new materials
Adding automatic watering systems
“Thinking Outside the Box” with creative configurations and shapes
Square Foot Gardening in dense urban areas with little or no yard
Winner of the Garden Media Guild (UK) Practical Book of the Year Award for 2017
No dig organic gardening saves time and work. It requires an annual dressing of compost to help accelerate the improvement in soil structure and leads to higher fertility and fewer weeds. No dig experts Charles Dowding and Stephanie Hafferty, explain how to set up a no dig garden, including how to:
Make compost and enrich soil
Learn skills you need to sow and grow annual and perennial veg
Harvest and prepare food year round
Make natural cosmetics, cleaning products, and garden preparations
The no dig approach works as well in small spaces as in large gardens. The authors’ combined experience covers methods of growing, preparing and storing the plants you grow for many uses, and includes recipes and ideas for increasing self-reliance, saving money, living sustainably, and enjoying the pleasure of growing your own food, year round. An acknowledged expert in no dig and author of a half-dozen books on the subject, Charles’ advice is distilled from 35 years of growing vegetables intensively and efficiently. Stephanie, a kitchen gardener, grows in her small, productive home garden and allotment, and creates no dig gardens for restaurants and private estates. She creates delicious seasonal recipes made from the vegetables anyone can grow. She also explains how to use common plants you can grow and forage for to make handmade preparations for the home and garden.
For indoor gardeners everywhere, Darryl Cheng offers a new way to grow healthy houseplants. He teaches the art of understanding a plant’s needs and giving it a home with the right balance of light, water, and nutrients. After reading Cheng, the indoor gardener will be far less the passive follower of rules for the care of each species and much more the confident, active grower, relying on observation and insight. And in the process, the plant owner becomes a plant lover, bonded to these beautiful living things by a simple love and appreciation of nature. The New Plant Parent covers all the basics of growing houseplants, from finding the right light, to everyday care like watering and fertilizing, to containers, to recommended species. Cheng’s friendly tone, personal stories, and accessible photographs fill his book with the same generous spirit that has made @houseplantjournal, his Instagram account, a popular source of advice and inspiration for thousands of indoor gardeners
“Hilton Carter’s love for plants is infectious… His lush and exuberant displays are inspiring reminders that plants can be so much more than neat little containers on a window sill.”Grace Bonney, Founder and Editor-in-Chief, Design*Sponge
Take a tour through Hilton’s own apartment and other lush spaces, filled with a huge array of thriving plants, and learn all you need to know to create your own urban jungle. As the owner of over 200 plants, Hilton feels strongly about the role of plants in one’s home – not just for the beauty they add, but for health benefits as well: ‘having plants in your home not only adds life, but changes the airflow throughout. It’s also a key design element when styling your place. For me, it wasn’t about just having greenery, but having the right variety of greenery. I like to see the different textures of foliage all grouped together. You take a fiddle leaf fig and sandwich it between a birds of paradise and a monstera and…. Yes!’ You will be armed with the know-how you need to care for your plants, where to place them, how to propagate, how to find the right pot, and much more, and most importantly, how to arrange them so that they look their best. Combine sizes and leaf shapes to stunning effect, grow your own succulents from leaf cuttings, create your own air plant display, and more.
When the inspiration hits to start an organic garden, many novices could benefit from a guidebook that speaks directly to their enthusiasm, their goals, and, of course, their need for solid information that speaks a newbie’s language—from the most trusted source for organic gardening methods.
In Rodale’s Basic Organic Gardening by Deborah L. Martin, general garden-building skills (from “Do I need to dig?” to “Where do I dig?”) and specific techniques (from “How do I plant a seed?” to “How much should I water?”) are presented in growing-season order—from garden planning and planting to growing and harvesting. Many other need-to-know topics like soil, compost, seeds, pest control, and weeds are explained in simple language to ensure success, even on a small scale, on the first try. More than 100 common garden terms are defined, and Smart Starts sidebars offer doable projects to build confidence and enthusiasm for expanding a garden when a gardener is ready. A flower, vegetable, and herb finder highlights easycare plants with good track records. Plus, there are no-dig garden methods, simple garden layouts, and tips and hints
Create the flower garden of your dreams. This comprehensive guide includes expert advice on everything from choosing an appropriate growing site to maximizing the lifespan of your plants. Charming illustrations and photographs accompany helpful tips on how to improve soil, fight off pests, and make all your flowers bloom with radiant color. Whether you’re a beginning gardener or a seasoned florist, The Flower Gardener’s Bible is a useful resource that will help you keep your garden healthy and beautiful for years to come.
Smith’s legendary high-yield gardening method emphasizes wide rows, organic methods, raised beds, and deep soil. Succeed with fussy plants, try new and unusual varieties, and learn how to innovatively extend your growing season. With thorough profiles of hundreds of popular varieties, The Vegetable Gardener’s Bible provides expert information and an inspiring roadmap for gardeners of all skill levels to enjoy abundant homegrown vegetables.
Whether you’re a seasoned gardener determined to increase crop yields or starting your very first vegetable garden, the Week-by-Week Vegetable Gardener’s Handbook will help you manage your schedule and prioritize what’s important. Detailed weekly to-do lists break gardening down into simple and manageable tasks so that you always know what needs to be done and when to do it, from starting seeds and planting strawberries to checking for tomato hornworms and harvesting carrots. Enjoy a bountiful harvest with this organized and stress-free approach to gardening.
With growing consumer awareness about the dangers of garden chemicals, turn to The Organic Gardener’s Handbook of Natural Pest and Disease Control as the most reliable and comprehensive guide on the garden shelf. Rodale has been the category leader in organic methods for decades, and this thoroughly updated edition features the latest science-based recommendations for battling garden problems. With all-new photos of common and recently introduced pests and plant diseases, you can quickly identify whether you’ve discovered garden friend or foe and what action, if any, you should take.
No other reference includes a wider range of methods for growing and maintaining an organic garden. The plant-by-plant guide features symptoms and solutions for 200 popular plants, including flowers, vegetables, trees, shrubs, and fruits. The insect-and-disease encyclopedia includes a photo identification guide and detailed descriptions of damage readers may see. The extensive coverage of the most up-to-date organic control techniques and products, presented in order of lowest impact to most intensive intervention, makes it easy to choose the best control.
Are you interested in growing your own plants from scratch? This reference book will teach you how to propagate virtually every type of plant.
If you’re a thrifty gardener who wants more plants for free, then this book is perfect for you! From fruit trees and ornamental shrubs to exotic orchids and succulents, get all the info you’ll need to propagate plants at your fingertips.
Discover the experts’ secrets to perfecting plant propagation with this easy-to-follow gardening manual. A horticulturist’s delight, this new edition features more than 1,800 detailed illustrations and photos that show both practical step-by-step gardening techniques and the plants themselves.
How long do your seedlings need to germinate? What makes a healthy stem cutting? How do you know what type of rootstock to use when grafting plants? Find out the answer to these questions and more in the most comprehensive guide to propagating plants ever published.
From palms and roses to culinary herbs and conifers, each chapter contains popular and botanically interesting plant groups. Explore the modes of propagation that are unique to the featured plants. Learn about their characteristic ways of reproduction and how these are exploited in various techniques. The techniques are fully illustrated with step-by-step photographs and explanatory artworks. The plants’ special needs are discussed, with expert tips on how to achieve success.
This gardening book is crammed with hundreds of step-by-step tutorials and clear advice, ranging from straightforward and simple to more in-depth. The rating system in the plant-by-plant A-Z dictionaries provides you with a quick reference to the relative ease or difficulty of each method of propagation.
Fill Your Garden with Beautiful Plants for Next-To-Nothing
Plant propagation is a fun, rewarding and inexpensive way to add shrubs to your garden or multiply your collection of houseplants. This book helps you successfully reach your goals while steering you clear of common mistakes. It’s an indispensable reference book for every propagator’s bookshelf.
Use this comprehensive gardening guide to:
Find out how to propagate more than 1,500 garden plants.
A-Z dictionaries of different genera of plants, like perennials, vegetables, or bulbous plants.
Follow the visual step-by-step guides and authoritative advice on cutting, layering, sowing, grafting, and more.
Starting plants from a seed grants earlier harvests, greater variety, healthier seedlings, lower costs, and the undeniable sense of satisfaction and reward.
For the most complete, up-to-date information on starting plants from seed, turn to The New Seed-Starter’s Handbook.Written by a gardener with 30 years of experience, this updated, easy-to-use reference explains everything you need to know to start seeds and raise healthy seedlings successfully.
You’ll find:
The latest research in seed starting
The best growing media
The newest gardening materials
Solutions to seed-starting problems
Source lists for seeds and hard-to-find gardening supplies
The robust encyclopedia section lists more than 200 plants—including vegetables and fruits, garden flowers, wildflowers, herbs, trees, and shrubs—with details on how to start each from seed.
For the gardener who wants to enjoy the benefits of gardening, without the frustrations. FOR THE COST OF ONE SIMPLE GARDEN TOOL, you can OWN THE MOST VALUABLE GARDEN TOOL OF ALL; one that will save you hundreds and perhaps thousands of dollars in mistakes.
You need to remember WHAT WORKS FOR YOU—IN YOUR GARDEN. Every gardener faces repeat attacks of pests or disease and needs to remember which treatment worked and which did more harm than good. Every gardener has weeded out emerging perennials, forgetting what they planted where. Every gardener needs a memory!
GARDENING IS AN ART, BUT IT’S ALSO A SCIENCE.
THE GARDEN JOURNAL, PLANNER & LOG BOOK is designed to make record-keeping simple and easy. Every form is designed to include all the pertinent information needed, while minimizing the amount of time required to record that information. Just on the individual plant pages alone, there are over fifty possible check boxes for each plant. Use as many or as few as you desire, and record as much or as little as you wish in the spaces for other information.
Fill out log pages for annuals, biennials and perennials, with the location of each plant
Keep track of the lifecycle of all your flowers, herbs, vines, etc. on log pages.
Fill in the times to prune, trim and tidy which plants by season, depending on your area.
Make a plan for up to four years on the planning pages.
Draw out garden plots for twenty beds on graph paper with notes on the pages opposite.
Keep records of hardscaping, weather, formulas, pests and diseases, cultivation and propagation, bloom and harvest times, flowers, bulbs, fruit, vegetables, herbs, vines, shrubs and trees.
Keep a diary for all the things you simply must write out using sentences or drawings, because as much as gardening is a science, it is an art above all.
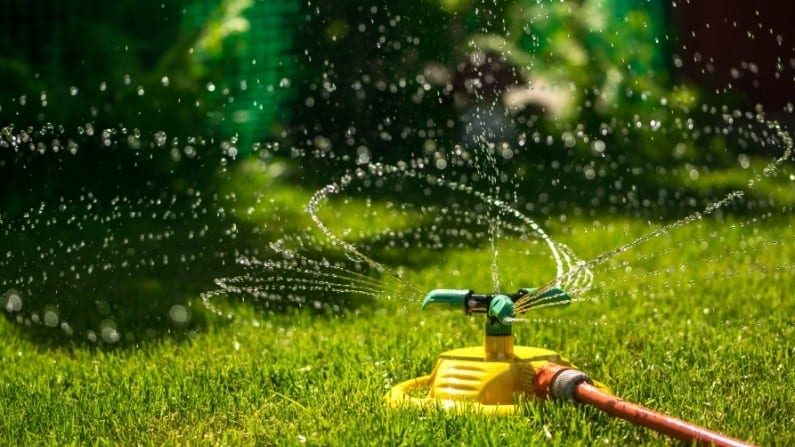
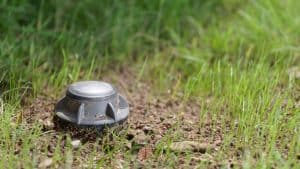
There are many types to choose from; some of them include pop-up sprinklers or impact sprinklers.
Pop up sprinklers
They install directly on lawns and goes down to the soil level, the best thing about them is that there is no risk of being tripped on by your kids or pets.
Pop up sprinklers are armed with nozzles that break from the soil and automatically rise when triggered by the controller, mostly used in locations where a lawnmower can damage or in a place where you don’t want people to be tripped on them.
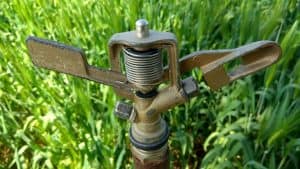
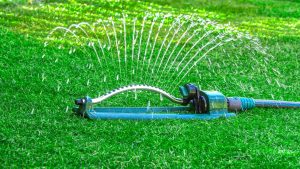
Impact nozzles
Impact nozzles on the other hand are built like a tank, more durable, and are good at handling pressure, and they stay fixed on top of the grass level, make sure you put them in a strategic place so that they reach the most of your garden without being on the way to prevent tripping children.
Known for the noise they create by the impact hammer that knocks on a fixed plate, they operate based on Water-pressure which collect from the head and activates the hammer to move aside and cover the maximum length of the yard in an even application in all sides.
As an instance 360degree coverage will be utilized at the exact middle of a yard. Use a 180-degree in the way that you will cover one part of the yard. There are also 90-degree sprinklers that you may use for your corners.
where not to use the impact nozzls:
Not ideal in case you’ve got low water pressure
May not be Acceptable for fresh seed’s backyard due to the high pressure water output
Make Sure That You Are not wasting water spraying on a sidewalk. if so you can quickly fix them by hand until you achieve your sweet spot.
sprinkler rotors or rotor heads :
Medium to large yards, you need a water system with a pressure that exceeds 30 PSI for good efficiency, a small one could be ideal for a 15 to 50 feet lawn
Characteristics:
slow water spraying, suitable for slow drainage yards
Their output is a stream of water and is a good alternative for sprayers when facing windy situations.
oscillating sprinkler
this option comes with the form of a tube with many holes punctured on its surface and can cover a broader part of your yard it is mostly popular and loved by kids and pets.
It is activated automatically as soon as the water pressure is detected:
As water is sprayed by the holes, the pressure will push the sprinkler tube to maneuver backwards and forwards which is the difficult factor with this sprinkler because you simply want the right quantity of water pressure indicated by the producer if you would like the product to make use of at optimum ranges.
If the water pressure is just too low, the sprinkler won’t spray a sufficient amount, when the pressure is too excessive, it’s going to spray far in the distance.
This type of sprinkler heads is not just for watering but rather for pests and animal control
The Yard Enforcer is a motion-activated sprinkler that combines sound, water, motion and ingenuity as a defense to the landscape, to deter deers, birds, cats, dogs, skunks, opossums, and other similar pests and animals without hurting them.
The powerful infrared sensor can detect intruders from up to 40 feet away and has a wide viewing angle of 120 degrees, that’s 1600 square feet of protective coverage from a single unit.
Includes sensing technology for optimum water and battery conservation
Sensing technology learns the difference between trees and animals, so it will not activate every time the wind blows.
has a 30-minute watering cycle that enables it to function as a timed sprinkler to water your garden.
has the ability to connect additional Enforcers to increase the impact area
you have also the option add an impact sprinklers downstream of your Yard Enforcer, to be triggered by the sensor as well.
This sprinkler has the ability to spray up to 90 feet in diameter, covering 6,360 square feet when set to a full circle
The brass construction can withstand high water pressures and severe weather conditions
Easily adjust spray coverage from a partial section to full 360° watering
Use the deflector shield and diffuser screw to alter the stream and change the spray distance radius.
stable tripod base that extends up to 48 inches to allow for adjustments as plants grow
Gooseneck connection makes it easy to connect to your hose.
It towers over tall plants, and features a brass impact head that’s capable of spraying distances up to 100 feet.
This tripod has been designed to resist tipping, legs can be firmly planted on the ground, resisting the force of the powerful spray created by the brass impact head.
Know more about sprinkler heads
Why it is good to have Sprinkler Head?
A safe system to use especially the ones that can be planted underground.
You can choose a portable sprinkler head to move it around depending on your watering needs.
Easy to set up and work without intervening.
Fun to use and could serve as an activity for your kids during the summer days.
Can be set with a timer to water your garden at your chosen time.
Set it and forget it by setting up the duration and water amount.
Efficiency factors you should be looking at:
Depending on the size of your garden, you can choose from the different heads
Consider fixed spray sprinkler for small gardens it can work efficiently
For medium to extensive gardens, you can select a multi-stream sprinkler
Find the most adjustable.
Try to find the most adjustable and the one that can rotate to make sure it fits your garden needs to water more space if you wish.
The optimum sprinkler head needs to regulate to your actual water pressure,
be sure you set up sprinklers on the appropriate distance from each other
Overwatering, same as under watering, results in unhealthy grass
depends upon the form of your yard
In any other case, you’ll probably find yourself wasting water on the drive way.
The right capacity for your needs
The worst scenario is buying the best fitting product and figuring out that it doesn’t cover the whole garden when you finally place it. To avoid that, make sure you check the range of it and maximum cover that it provides and buy more coverage than you need, to cover up for the lack of water pressure.
Distance from the soil:
You can measure it from the top of the nozzle to the base of the rising hole.
The mechanical structure is connected to the sprinkler timer that controls the opening, running, and closing of the whole automatic system. Some timers are also equipped with sensors to stop watering when it is raining.
Whatever you choose, make sure you find the sweet spot for your watering needs. Too much pressure can affect wastewater by providing more than the lawn needs. Too little pressure and your plants and trees die due to the lack of water.
If you want to water your cultivated plants, check if they support having wet leaves, some varieties won’t survive and attract diseases.
So make sure you won’t use a spray head for that part of your plantings and use, for example, drip irrigation or a bubbler sprinkler head instead.
For lawns, sprayers work best at covering the whole space.
For bushes it’s better to use Bubblers to be able to give an adequate quantity of water.
For vegies and flower beds it’s better to make use of drip irrigation or soaker hoses.
The material :
The best material available for sprinklers is brass; it is usually used at creating impact sprinklers because of its sturdiness, has an elegant look, lasts longer, but this comes with more cost.
The second best choice would be metal; metal is prone to rust, which could harm its functionality. To prevent that, buy one with a protective coating.
The third choice is the most affordable, and it’s plastic. If you are going to buy a plastic sprinkler, look for the one that has the strongest built that doesn’t seem to break with pressure
sprinkler that’s made with brass of long-lasting zinc
Additionally, search for sprinkler heads with adjustable screws that will let you fiddle with the spray output.
Become a master of the Rubik’s Cube with this online tutorial. Learn how to solve the cube with the beginner’s method!
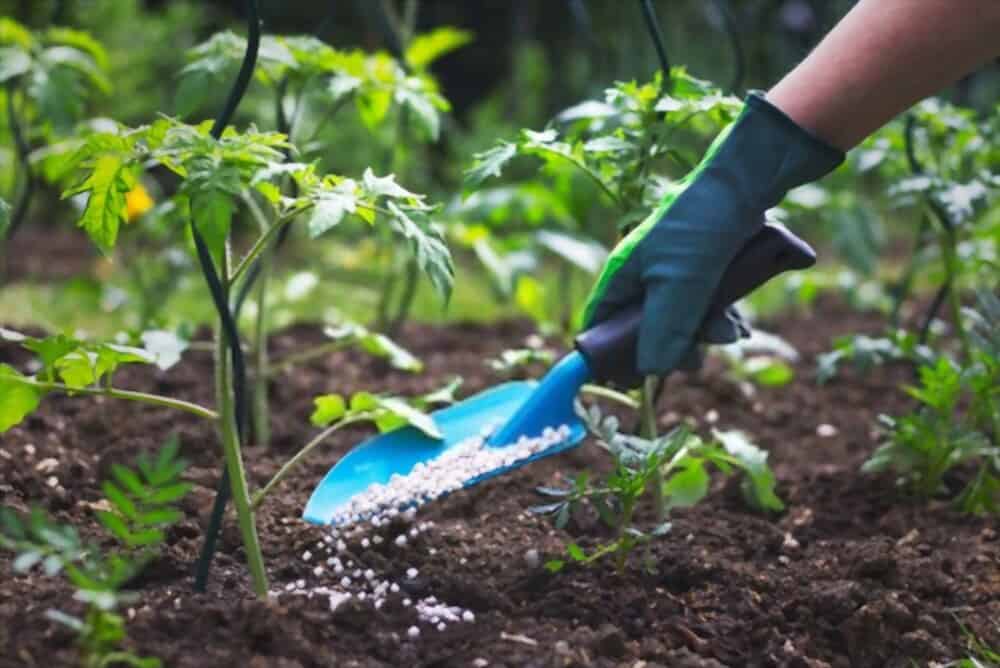
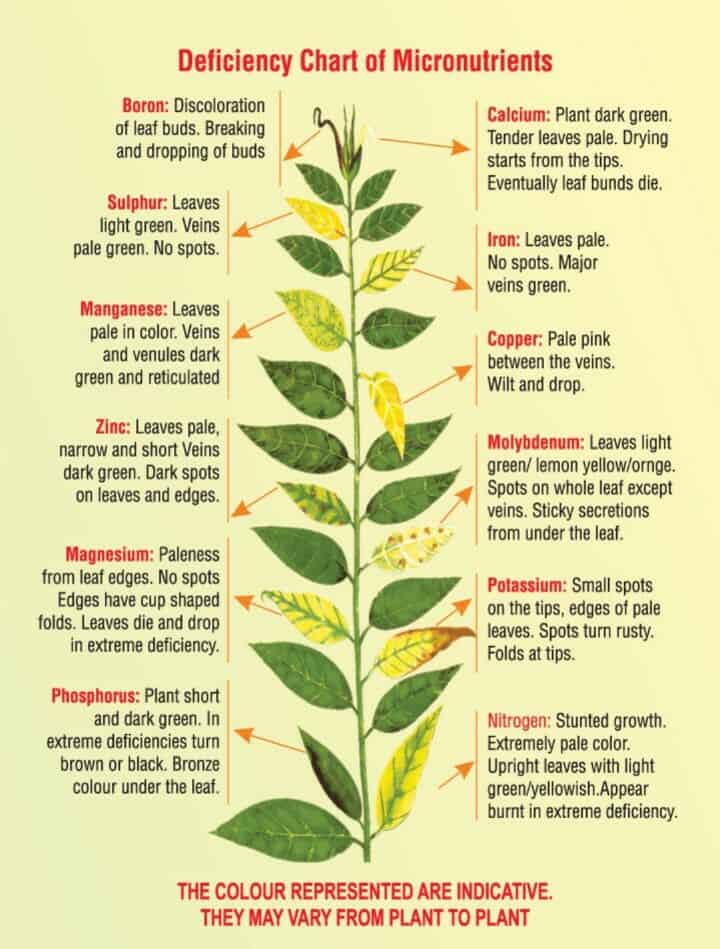
It is often hard to know which plant nutrients are needed and how to get the right fertilization to cover the deficiencies, especially when growing heavy eaters like tomatoes so what are tomato plant nutrient requirements? And how to cover deficiencies?
-Vital requirements for every plant (including tomatoes) are Nitrogen, Phosphorus, and Potassium (NPK). The plant needs them as the pillars of its growth; their level needs to be tested and replaced by compost or fertilizers.
-Supporting nutrients: (calcium, magnesium, and sulfur) their deficiencies or surplus might cause some serious diseases, as they also affect pH level when they are down and could be replaced by amending them into the soil.
-Micronutrients: (Zinc, Iron, Boron, chloride…) are used in small amounts and serve various purposes make replace them by adding mulch grass clippings and top level organic coverage.
Now that you know in general what the requirements for tomatoes are. Let us go deep into each one of them and see which one you should add for your plants’ different stages and how to avoid different diseases.
h
Table of contents
$
How to get the right nutrients for each stage of the tomato plant growth?
$
How do you know which nutrient has deficiencies?
$
How to bring Nutrients back to the soil?
$
How to replace each nutrient?
How to get the right nutrients for each stage of the tomato plant growth?
To get your tomato plant the nutrients needed for each stage of their growth, you will need quality soil, well mixed with compost, to begin with, and bring requirements such as fertilizers to other solutions:
Seed starting:
Seeds will not need fertilizers to germinate and start growing seedlings, but we recommend planting them on loose potting soil to make it easier for the plant to develop a healthy rooting system.
We recommend checking this article to give you the exact steps to produce healthy, high-quality seedlings and transplant them the right way to get the best growth.
Seedlings:
During this stage where the plant is forming you’ll have to provide a lot of nutrients for its growth to make sure that the tomato plant achieves two important things:
Seedlings need to get significant amounts of nutrients to become healthy, fully grown plants, and therefore less susceptible to catch diseases.
The bigger the early growth it achieves, the more it will produce high quality and quantity fruits.
The soil’s quality in which the plant is grown is the defining factor here. So we suggest a good preparation for the ground and taking the best care for your seedlings.
Fully grown plants:
After the plant achieves full growth and begins flowering, it will need the most nutrients to produce healthy, rich fruits, so we suggest that you get the plant the fertilization it needs to concentrate on growing the best possible fruits.
As we suggest in our article, on the best way to get the best quality tomatoes, you’ll need to provide fertilization every week when the plant is starting to produce fruits until the end.
Now let’s go deep into each of the nutrients one by one: here, we can give you some ways you can tell if your soil has the necessary nutrients to it and in what phase you will have to add the missing ones.
How do you know which nutrient has deficiencies?
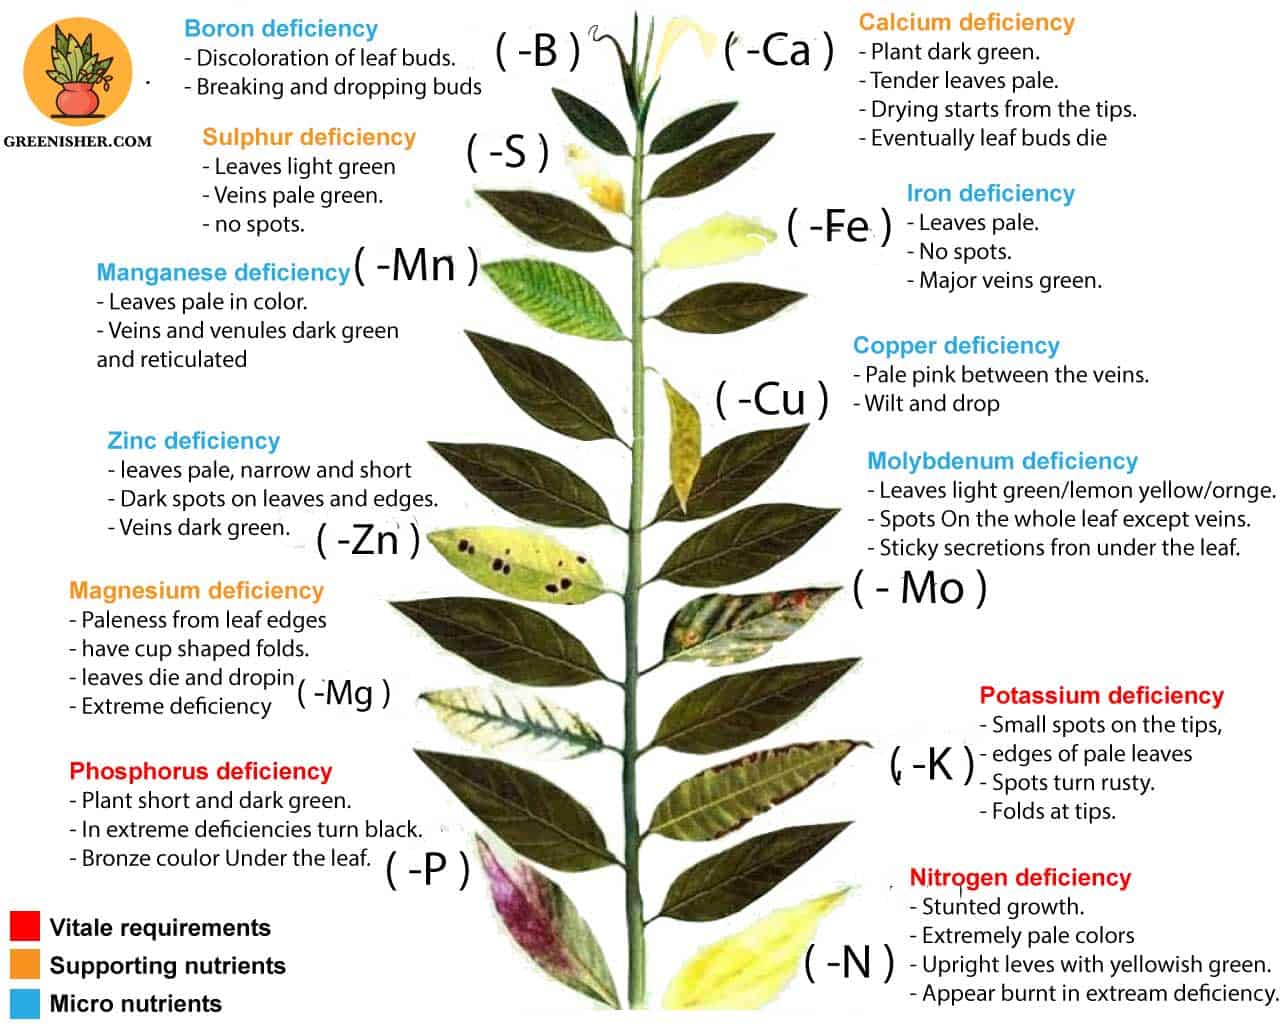
if there are deficiencies of any nutrient, leaves will show you the signs by scorching or go brown and roll up inward or downward and in order for you to be capable of reading those signs we made a representation of all the deficiencies that could happen depending on each nutrient
How to bring Nutrients back to the soil?
Our first solution to bring back the nutrient to your soil is to get the cycle of nature repeating but making sure you are not wasting those valuable scraps that could be used as a long term solution:
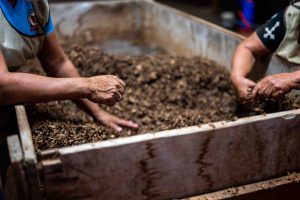
Kitchen Scrap
Put your kitchen and garden waste to work by making your compost. Compost releases nutrients slowly, which means a well-composted garden can go a year or two without requiring fertilizer reapplication. Compost also helps the soil retain moisture, which is essential for vegetable gardens to thrive during hot, dry summers.
Coffee Grounds
Coffee grounds come with a lot of uses, but one of their best is as a fertilizer. Many plants, such as blueberries, rhododendron, roses, and tomatoes thrive best in acidic soil. Recycle your coffee grounds to help acidify your soil. There are a couple of ways to do this— you can either top dress by sprinkling the used grounds over the surface of the soil, or you can make “coffee” to pour on your gardens. Soak up to six cups of used coffee grounds for up to a week to make garden coffee, then use it to water your acid-loving plants.
Eggshells
If you’ve ever used lime in your garden, then you know it comes with lots of benefits — chiefly, it helps lower the acidity of your soil for plants that don’t like acid, and it provides plants with lots of calcium, which is an essential nutrient. Wash out the eggshells from your kitchen, keep them, and crush them to use in your garden. It turns out that eggshells are 93% calcium carbonate, which is the scientific name for lime.
Banana Peels
We eat bananas for their potassium, and roses love potassium too. Bury peels in a hole alongside the rose bush so that they can compost naturally. As the rose grows, bury the peels into the soil’s top layer. Both of these approaches will provide much-needed potassium for the plant’s proper growth. Read about composting here.
Tree Leaves
Rather than bagging up the fall leaves and putting them out on your curb, collect them for your gardens instead. Leaves are rich with trace minerals, they attract earthworms, they retain moisture, and they’ll help make heavy soils lighter. You can use leaves in two ways: Either till them into your soil (or mix crushed leaves into potting soil), or use them as a mulch to fertilize your plants and keep weeds down.
Grass Clippings
If you have an organic lawn, make sure to collect your grass clippings to use on your gardens. Half an inch to an inch of grass clippings makes a great weed-blocking mulch, and it is also rich in nitrogen, which is an essential nutrient for most plants.
Weeds
Just like grass clippings, many of the weeds that you’ll find in your gardens are very high in nitrogen and will make an excellent fertilizer. The problem is, once you’ve pulled the weeds, you certainly won’t want to put them back in the garden because any seeds will sprout and make new weeds. The solution? Make weed tea. To do this, fill a five-gallon bucket no more than 1/4 full of weeds that you’ve pulled. Then fill the bucket the rest of the way with water, and let the weeds soak for a week or two. Once the water turns nice and brown (like tea), pour this weed tea on your gardens.
Manure
Manure comes from a variety of sources — cows, horses, chickens, and even bats. Each type of waste is high in nitrogen and other nutrients, but you’ll need to use it carefully. Raw manure is highly acidic and may have more nutrients than your plants need, so too much can burn your plants. It’s best to use composted manure. Since it is less nutrient-dense and acidic, you can use more of it to improve your soil’s water retention without risking your plants. You won’t have to wait long—manure quickly turns to a perfect odor-free soil amendment.
All the above; Compost.
Compost in a gold mine of nutrients that gives a variety of totally organic matters benefiting the pant in all aspects of its growth.
Of course, compost is not the go-to solution if, for example, you have a deficiency problem with your actual tomato plants; its efficiency is seen in the long run, so you can use it to work the soil and fill it with the right nutrients right from the beginning of the season
because food scraps produce compost, nutrients on it will depend on the things you provide it with, so make sure you follow the rules to make good quality compost.
Raw materials
You can add many other amendments to the garden to boost your harvest and improve your blooms. Raw materials created from the grinding of dry, organic materials speed the decomposition process for microbes and help convert the elements more readily. Use these raw materials individually or combined to achieve multiple benefits. You can find most of these products at your local garden center, feed supply store.
Raw organic fertilizers and their uses:
Organic alfalfa (2,5:0,5:2,5) A non-burning source of nitrogen and contains the naturally occurring growth hormone, Triacontanol, boosts seedlings’ growth rates.
–Corn gluten meal (8:0:0) Fertilizes lawns and shrubs while preventing weeds from emerging. Helps properties develop deeper roots and require less watering.
–Bone meal (4:12:0) Boosts root growth at transplant and benefits at fruiting.
–Fish bone meal or Fish meal : Non-burning source of nitrogen and trace elements. Also, an excellent soil conditioner.
–Greensand (0:2:5) Contains glauconite, which is high in iron, potassium, and magnesium. It also helps loosen soil, improve moisture retention, soften hard water, and increase root growth
How to replace each nutrient?
Watch this short video to know more about each nutrient and ways to replace its defficiency.
The big three:
Nitrogen, Phosphorus, and Potassium are Vital nutrients to the tomato plant, but you should test and see if your soil has them already or does it have deficiencies in one of them.
(NPK) is the abbreviation for Nitrogen, phosphorus, and potassium.
if you have balanced soil and you provide compost regularly you don’t want the soil to have an excess of nitrogen it might result in a lush (very few tomatoes) it’s better to use a solution that is lower in nitrogen you’ll find it labeled in the package that NPK is 5-10-5 or 5-10-5. here is an article to show you all the fertilizers depending on every situation.
Nitrogen:
Nitrogen Is essential for every leafy plant to grow the leaves and therefore, the plant; helps the plant’s cell growth and chlorophyll production.
You can diagnose the lack of it by watching your plant and seeing if they have slow or spindly growth by spotting the old lower leaves turning yellow and dying.
Last season’s results also might tell you a lot about your soil’s actual situation; if the growth was right, and you didn’t have dying leaves by the end of it, your soil is balanced and has adequate amounts of Nitrogen.
Compost is one of the richest compositions on Nitrogen as it is composed mainly of it.
Phosphorus:
Phosphorus is one of the components that help the plant grow and have healthy roots cope with stress, and add energy production for the fruits to ripen.
lack of it will result in slow growth, the leaves turning blue, or the fall of the fruits in some cases
Compost actually will have reasonable amounts of phosphorus, mainly if it contains many banana scraps; otherwise, you should supply it regularly as the fruits begin to grow as needed at the beginning and the end.
Potassium:
potassium is vital for flower development, photosynthesis, and fruit growth, and it also helps prevents some sorts of diseases
if there are deficiencies of it, leaves will show signs of scorching the might go brown and roll up inward or downward
Supporting trio:
Calcium:
Tomatoes are considered more nutritious if they have higher amounts of it, and it helps cell health to make them more protected against diseases and bruises.
Lack of it shows long leaves cutting inward and lacking colors; it’s generally a sign that the soil is acidic and will cause (blossom end root) syndrome.
Magnesium and Sulfur:
Magnesium is needed in photosynthesis and chlorophyll production really on it to help their overall quality.
Sulfur is needed for proteins and amino acid consumption from the soil.
The absence of those two nutrients will harm the growth and causes yellow leaves, resulting in a disease called “interview chlorosis.”
Micronutrients:
A tomato needs those micronutrients in small quantities to help serve many smaller purposes. Some examples are:
Molybdenum: helps tomatoes use Nitrogen efficiently
Zinc: Regulate the growth and promote proper sugar consumption
Boron: assists tomatoes in making use of nutrients and is also essential for the development of fruits and seeds
And there are still a lot of nutrients needed for a good tomato plant development like Iron, Chloride, Copper. But those secondary nutrients could be provided by organic matters such as grass cuttings, old leaves, and mulch; As you spread them on top of the soil to keep an adequate moisture level and slowly decompose to provide those nutrients for your plants.
Tomatoes were and will always be one of our most valuable assets on the garden, and sometime we invest so much in it that we forgot about the other plants, and then we just say can I benefit my plants with the surplus that I have from tomato fertilizer, after all plants are somehow all similar and have common requirements, so the question is Can you use tomato fertilizer for other plants ?
The answer will be :
Yes why not, most tomatoes liquid fertilizers or granules are made of nitrogen, phosphorus and potassium as primary nutrients and these are the main requirements for almost all the plants, of course they might need different doses depending on their built. follow our step by step to know if it is totally beneficial to add tomato fertilizer for your plants
First of all, see what does your fertilizer contain:
if you are using any type of fertilization that is manufactured you can actually see the component of the fertilizer with the doses that they come with.
Since you have a tomato fertilizer: you can see the NPK doses that are the main focus ors each in google with the name of the product if it happened that you couldn’t find that information, some products have other nutrients included like calcium magnesium … and those nutrients help the plant face some diseases and grow strong. you can see all the nutrients that tomatoes needs for different stages in this article
Second, read about your plant:
To see what does the plant needs and its nutrients requirements generally all the plants have 3 major parts of nutrients that they need to take from the soil and those are : primary (NPK) in large quantities , secondary (Calcium, magnesium and sulfur) in medium quantities and finally micronutrient (iron, boron, manganese…) in small quantities.
you can provide those nutrients by constantly working your soil and adding good quality compost that has a diverse mix of nutrients, of if you planted heavy feeders like tomatoes of peppers in the area, it’s wise to add the nutrients especially primary and the missing ones by the next season
Third, be careful
it might sound like a good idea to just add nutrients to your plants without knowing what they need, but you can actually burn your plants of just kill them by adding nutrients that they don’t need this is why it is mandatory to know what does your soil is lacking from either by testing the soil or watching the plant growth closely and reading the signs of missing nutrients
this image help you spot the diffeciencie that there are in the plants and help you learn more about the plant to provide the right nutrients for it
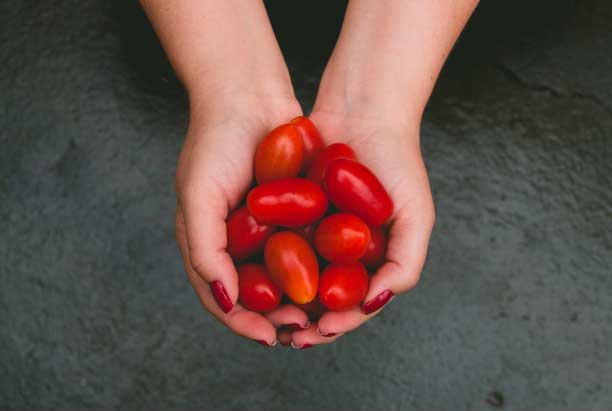
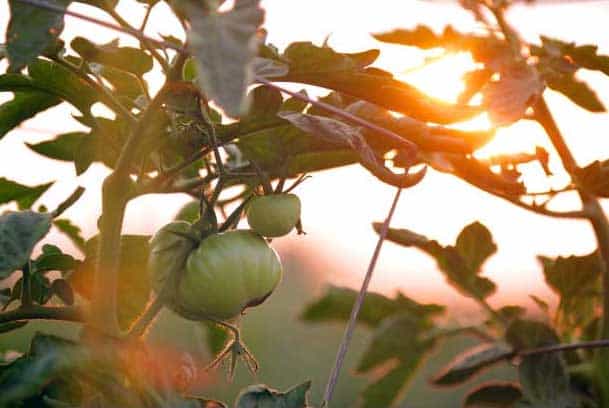
Tomatoes are probably the most satisfying plants to experience on your garden, even thought they may not be the easiest to grow we all want the experiment with them at every spring, I mean who doesn’t want to see small tomatoes growing in your garden! they are cute like babies , and it is soo much fun!!!
In this guide we are going to provide you with all the necessary knowledge for you to be able to grow your precious tomatoes indoor or in a small garden, enough missing up this year you’re going to get them right.
Getting your seedlings ready
You can either start your own seedlings at home or just by them from the nursery, we will make sure that you get the best start possible because it will be the N°1 factor for your success.
10 steps to start tomato seedlings at home
In fact creating your own seedlings at home is easy and you’ll get to live the full experience with your plants from the moment you put them on the soil until they become mature follow those easy steps to create the best possible plants :
Step 1:choose a variety of tomatoes that you like and consume frequently; there are so many varieties and it’s all depends on your personal preference after all you are the one who is going to eat them.
Step 2: buy good quality seeds from your seed provider (it is preferable that you get the highest quality diseased free seeds)
Step 3: start sowing those seed from late January until late mars indoors and from early mars until late April outdoor ( if the last frost has passed)
Step 4: put them on a 7cm pot or seed starter in moist compost or in sterile seed-starting mix
Step 5: water them and cover with a cling film (remove it as soon as they germinate)
Step 6: put them in a warm place close to a bright windowsill.
Step 7: transplant them separately in 5cm pots when they have their first set of true leaves.
Step 8: provide abandon amount of light ; preferably strong direct light at least 14 to 18 hours
Step 9: move and sway in breeze or turn a fan ; breeze will develop strong steem for the plant
Step 10: move them outside as soon as the weather warm up and you have worked the soil
What seedlings to buy from the nursery
If you’ve decided to buy seedlings done for you from the nursery it is crucial that you choose the best ones, but it isn’t always obvious know how to inspect them otherwise you are deemed to fail from the beginning:
Avoid the biggest and tallest. your fist move is to choose the tallest seedling on display, it’s not always the best choice.
these may have been competing for light in the growing conditions but Smaller seedlings are more likely to grow faster and suffer less transplant shock.
Look at the roots, roots are what defines if a plant will do or die,
Check the rooting system by gently and carefully lifting the seedlings from the pot, good ones should have well formed root balls holding the potting mix in a solid mass (not too long that they couldn’t find space and not too short that they could’t lift the soil) Ask the seller if you’re allowed to check it is the best insurance policy.
Check the foliage, Leaves should be a consistent strong solid color
Make sure that they do not have any yellowish part or any sort of spots beginning to form, or any evidence of disease.
Moving the seedling outside
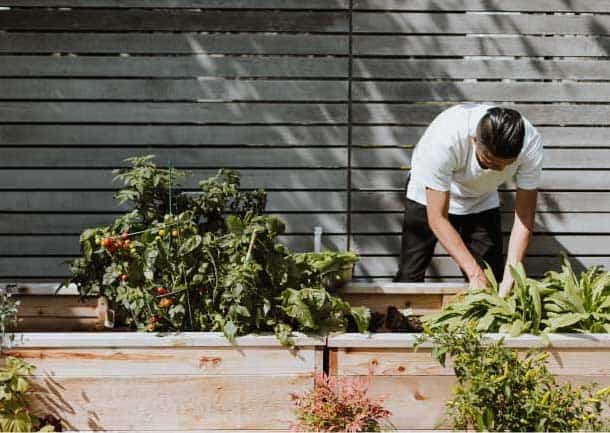
Like we said tomatoes need to have a lot of nutrients so you need to move your plants to bigger containers or to your raised beds for them to have more space also make sure you are choosing the sunniest place possible and then start by preparing your soil:
how to prepare the soil
Tomatoes are heavy feeders and they need a lot of nutrients and an abundant amount of sun to be able to give you the best possible yield, and for that you need to enrich your soil with peat free potting compost, you’ll also need to pre heat your garden soil days before moving your tomatoes in.
Your tomatoes won’t grow if the soil is cold or freezing they will rather die, if you want to move them early into the soil make sure to cover it with a blanket or a piece of plastic for a week or two to warm up and keep a consistent warmth day and night or wait until may for it to get warm naturally and then move them outside.
Start digging your soil: You can grow them in rows in your garden soil or raised beds or you can choose to grow them on at least 30cm pots or containers, either ways make sure to space between the plants is at least 2 to 3 feets (50-100cm) and 5 feet (150cm) between the rows.
To plant your seedling you have two options: either plant them deep into the soil or you can do the trenching method to plant it horizontally by gently bending the stem up. And just fill in the trench. Around the tomato plant, Leave few top leaves on top of the soil, and the plant will develop roots on the stems to give you a strong more reliable built that can get the nutrients it needs easily.
Now you can choose to put cages or stackes depending on the variety that you chose to plant indeterminate or determinant * make sure to implant them before moving your plants to make sure you are not shocking the plant do this in the seamless way possible
make sure not to put mulch as soon as you plant them especially if the soil is still cold, as soon as temperature is consistent , add mulch to keep moisture and protect from the weeds to come.
Phase 3: provide the best care and nutrients for your plants
When the plant is growing and starting to flourish, make sure to pitch out the side shoots especially if you are growing indeterminate varieties this will help the plant concentrate more energy on growing fruits rather than leaves, you can keep one to two side shoots in the determinate plants especially if you are using a growing cage.
after the first fruit start to take form you will need to start adding tomato food fertilizer weekly for the plant to be fully capable and produce high quality fruits, then you need to make sure you strip aways leaves underneath the suits for better light and air circulation.
When you have at least 4 trusses (clusters) on a single end pinch out the growing tip, this is a sign for the plant to focus on growing big quality fruits rather than volume low quality, also in the end of the season if you want the plant to hurry up and ripped the fruits.
Watering your tomatoes :
We talked about watering your tomato plants in a dedicated section because it is one of the main factors people don’t succeed growing tomatoes and before the know it the plant is dead.
So you have to be careful: tomatoes will need generally one inch of water per week for the normal days, when the days start to heat make sure you give it a little more, leaves will tell you if they need water(when you see them wilt most of the day) but make sure not to over water and flood the roots (roots need air too) or under water until you kill the plant , keep it in the middle
inconsistent watering will make your tomato fruits to split and crack or catch diseases such as blossom end rot (causes deficiency of calcium), what happen is that rapid changes in soil moisture levels cause fruits to expand quicker than the tomato skin can grow and they split also this inconsistency keep calcium from achieving tomatoes and causes black spots on them.
Also make sure you water the soil not the leaves or the steams, to avoid some other diseases.
how to protect your plants from diseases, pests and worms
Make sure to cut the lower branches especially if the leaves are touching the soil, to avoid catching fungus and soil borne pathogens can easily get into them.
do not over feed, too much nitrogen can cause the plants lush and not really fruitful
if your leaves are turning yellow, this might be a sign of nutrient deficiency so make sure you are providing them with the right nutrients.
If you’ll face tomato worm you need to get rid of them as quickly as possible, otherwise they will consume all of your fruits.
make sure to take a look at this article if you have any problems or diseases on your plants.
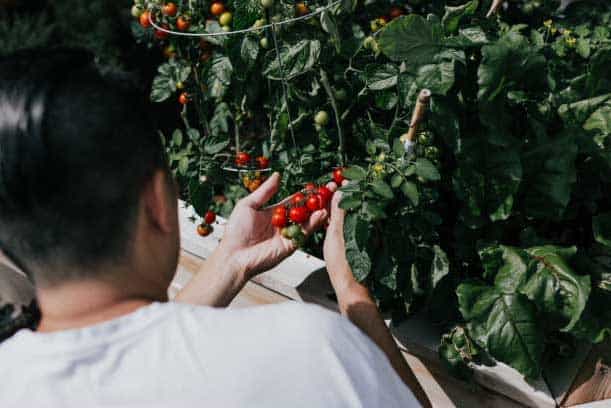
Harvesting your tomatoes
After 40 to 50 days from the day your seedling get out of the soil you’ll start to see fruits that are starting to take form and start growing make sure they are exposed to light and not covered with leaves.
you can eliminate the new fruits that form in the top to let those in the bottom become enormous, or pluck any ripen tomato once it achieve the desired size to give the chance for others to get bigger fast.
when they achieve the perfect size and start to ripen on the plant, ease up watering to make sure the plant will give them more sugar and they will have more flavor, be careful not to withhold water that the plant continuously wilt and stress (stress make it drop blossom and fruits)
Towards the end of the season prune off older leaves to let in more light and get the tomatoes to ripen vastly or you can get them to ripen indoors
Storing your excess of fruits:
tomatoes are better eaten fresh after harvest or store them in room temperature, they don’t freeze well so avoid the fridge that can make them develop a mealy texture.
if you still want to freeze them we suggest you do it by making them tomato sauce
Now that you finished ready what was the most helpful tip for you , share it in the comments bellow
Every fertilizer that you add to your edible plants will contribute to making your food, next time you say you have an organic garden see what those fertilizers contain.
Food that you eat is for your body to use as a source of nutrients for its growth, start by asking yourself if this product is going to affect your health and try to read about the effect of its component on the human body in the long term use.
Well, today, we are bringing you alternatives for synthetic fertilizers, a list of recipes and products that you can use without harm to provide a ton of nutrients to your plants and body.
Things you should consider:
The type of fertilizer you choose depends on the kind of soil that you have. So don’t choose based on popularity what works for others may not work for you:
You should have good knowledge of your soil:
Here are some steps you could use to get every information you need to know about your soil to be able to give it the requirement that it thrives for:
First, what type of soil do you have
What type of soil do you have? (clay, sand, or loam) Loam is considered the best of all, but most of us combine all three, with either clay or sand featured more prominently.
Sandy soils are excellent with drainage, almost too great, but have difficulty holding nutrients. Clay soils are fertile but have drainage issues and are really hard to work.
Second, what nutrients does it need?
If you don’t know what nutrients your soil is missing, do a quick test to be sure. They don’t cost much and are usually done through your local horticulture extension or buy home test kits. Check soil test kit here
The main ingredients in most fertilizers are nitrogen, phosphorous, and potassium (NPK), but the percentage of each component in all types of fertilization varies greatly. What one plant thrives on another may not need, so use the manufacturer’s suggestions if you buy a packaged fertilizer to see which type of plants it is made for.
Third, How about the PH levels?
Your soil’s PH levels and the fertilizer you present might be working against the plants rather than helping them!
For example, if a plant shows signs of phosphorus deficiency and the soil is too acidic, it wouldn’t matter how much phosphorus fertilizer you apply. Your plants won’t be able to use them.
A neutral pH or slightly acidic for vegetables allows the fullest availability of nutrients to all plants.
To adjust the soil’s pH, you’ll need to determine the pH according to a soil test. From there, you can add either lime or sulfur, depending on whether you want to raise or lower the pH.
After doing the pH test, check this article on how to change your soil’s pH levels.
Note that fertilizing your vegetables only helps if the cause of the low growth/production is a lack of nutrients in the soil. Other factor such as shade, watering … can’t be fixed by fertilizing.
Types of Fertilizers
Fertilizers could be characterized by two categories organically and synthetic here in this article; we are going to cover most of the organic options that you have:
Organic fertilizers:
Organic fertilizers are made from products that are derived from natural sources. Organic fertilizers can carry water and nutrients and also amend your soil. Moreover, they are biodegradable, renewable, and environmental friendly. Since it is a slow-release fertilizer, there is no chance of over-fertilizing or creating toxic salts in your soil. The nutrients in these types of natural fertilizers are not refined or extracted; you can find them in these three types:
Powders:
Fish and plant meals are beneficial to gardeners who want finer granules to work into the soil and if they plan to mix them with other organic ingredients to make a custom fertilizer.
Granules:
Many tend to sprinkle the contents over the soil and then wait for it to be broken down and then absorbed, but this isn’t how to use them! You should try mixing them with the soil before transplanting, they slowly break down to feed the plants continuously
Liquids:
Most liquid products are sold in the concentrated form and need to be diluted with water. If you want to put your fertilizer in a spray bottle to spray the foliage or if you need to feed regularly as you water, then liquid fertilizers are an excellent choice.
Organic fertilizers work differently than chemical fertilizers, and it will take longer for you to see the results since they have a slow-releasing paste. Because they rely more on microorganisms and nature to help them break down, it can be frustrating to the impatient gardener who wants to see immediate results.
Synthetic Fertilizers
Some information about Synthetic fertilizers:
they are derived from the petroleum industry and tend to be acidic they serve the macro level of nutrition needs for the plants providing (NPK)
Some fertilizer blends offer secondary nutrients of calcium, iron, molybdenum, sulfur, and magnesium, but almost none contribute to the complete spectrum of micronutrients a plant needs for complete growth.
They work faster than organic fertilizers, but that benefit comes with a side effect. They can slowly drain all the other nutrients from the soil and, in the end, might start to decrease the growth of the plants.
Synthetic fertilizers do nothing to sustain soil health since they do not replenish any trace elements depleted from the garden beds’ continuous cropping.
The increases in the release of greenhouse gases, upsets the beneficial microbes needed by the plant, and acidifies the soil.
The danger of over-fertilization due to the excessive availability of nutrients in chemical fertilizers which builds up toxic substance that are harmful to your health
Alternatives to bring nutrients
Our first solution to bring back the nutrient to your soil is to get the cycle of nature repeating but making sure you are not wasting those valuable scraps that could be used as a long term solution:
Tree Leaves
Rather than bagging up the fall leaves and putting them out on your curb, collect them for your gardens instead. Leaves are rich with trace minerals, they appeal to earthworms, they preserve moisture, they usuallyassist make heavy soils lighter. You can use leaves in two ways: Either till them into your soil (or mix crushed leaves into potting soil), or use them as a mulch to fertilize your plants and keep weeds down.
Grass Clippings
You probably havelawn waste, so be sure to gather your grass clippings to use in your garden. Half an inch to an inch of grass clippings makes an ideal weed-blocking mulch, and additionally it is rich in nitrogen, which is an important nutrient for all crops.
Weeds
Just like grass clippings, many of the weeds that you’ll find in your gardens are very high in nitrogen and will make an excellent fertilizer. The problem is, once you’ve pulled the weeds, you certainly won’t want to put them back in the garden because any seeds will sprout and make new weeds. The solution? Make weed tea.
To do that, fill a five-gallon bucket not more than one-fourth filled with weeds that you simply’ve pulled. Then fill the bucket the rest of the way with water, and let the weeds soak for some weeks. As soon as the water turns brown (like tea), pour this weed tea in your gardens.
Kitchen Scrap
Put your kitchen and garden waste to work by making your compost. Compost releases nutrients slowly, which means a well-composted garden can go a year or two without requiring fertilizer reapplication. Compost also helps the soil retain moisture, which is essential for vegetable gardens to thrive during hot, dry summers.
Manure
Manure comes from a variety of sources — cows, horses, chickens, and even bats. Each type of waste is high in nitrogen and other nutrients, but you’ll need to use it carefully. Raw manure is highly acidic and may have more nutrients than your plants need, so too much can burn your plants. It’s best to use composted manure. Since it’s much less nutrient-dense and acidic, you should use extra of it to enhance your soil’s water retention without risking your crops. You won’t have to wait for a long time because manure rapidly turns to an ideal odor-free soil amendment.
Coffee Grounds
Coffee grounds include plenty of uses, however, one among their greatest is as a fertilizer. Many crops, similar toblueberries, rhododendron, roses, and tomatoes thrive in acidic soil. Recycle your coffee grounds to assist acidify your soil. There are a few methods to do that, you’ll be able to either apply it by sprinkling the used grounds over the top of the soil, or you can also make “coffee”to pour on your gardens. Soak up to six cups of used coffee grounds for up to a week to make garden coffee, then use it to water your acid-loving plants.
Eggshells
If you’ve ever used lime in your garden, then you know it comes with lots of benefits — chiefly, it helps lower the acidity of your soil for plants that don’t like acid, and it provides plants with lots of calcium, which is an essential nutrient. Wash out the eggshells from your kitchen, keep them, and crush them to use in your garden. It turns out that eggshells are 93% calcium carbonate, which is the scientific name for lime.
Banana Peels
We eat bananas to get some potassium, and roses love potassium too. Bury peels in a hole alongside the rose bush so that they can compost naturally. Because the rose grows, bury the peels into the soil’s high layer. Both of these approaches will provide much-needed potassium for the plant’s proper growth. Read about composting here.
All the above; Compost.
Compost in a gold mine of nutrients that gives a variety of totally organic matters benefiting the pant in all aspects of its growth.
Of course, compost is not the go-to solution if, for example, you have a deficiency problem with your actual tomato plants; its efficiency is seen in the long run, so you can use it to work the soil and fill it with the right nutrients right from the beginning of the season
because food scraps produce compost, nutrients on it will depend on the things you provide it with, so make sure you follow the right recipe to make good quality compost, here is an article about it
Raw materials
You can add many other amendments to the garden to boost your harvest and improve your blooms. Raw materials created from the grinding of dry, natural supplies speed the decomposition process for microbes and assist convert the elements extra fast. Use these raw materials individually or mixed to attain multiple benefits.
Raw organic fertilizers and their uses:
Organic alfalfa (2,5:0,5:2,5) A non-burning supply of nitrogen and incorporates the naturally occurring development hormone, Triacontanol, boosts seedlings’ progress rates.
–Corn gluten meal (8:0:0) Fertilizes lawns and shrubs while preventing weeds from emerging. Helps properties develop deeper roots and require less watering.
–Bone meal (4:12:0) Boosts root growth at transplant and benefits at fruiting.
–Fish bone meal or Fish meal : Non-burning source of nitrogen and trace elements. Also, an excellent soil conditioner.
–Greensand (0:2:5) Contains glauconite, which is high in iron, potassium, and magnesium. It also helps loosen soil, improve moisture retention, soften hard water, and increase root growth
Hey there! My name is Aïmene and I pretty much run the show over here,I started gardening when I were 12 y.o, since then my passion towards it just grow and now i have a mission to help people like me, with no large fields to Grow their own food in containers.


 Tree Leaves
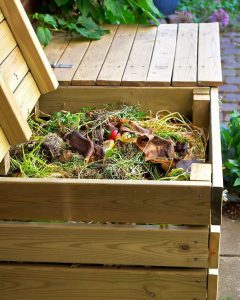
 Harvesting your tomatoes
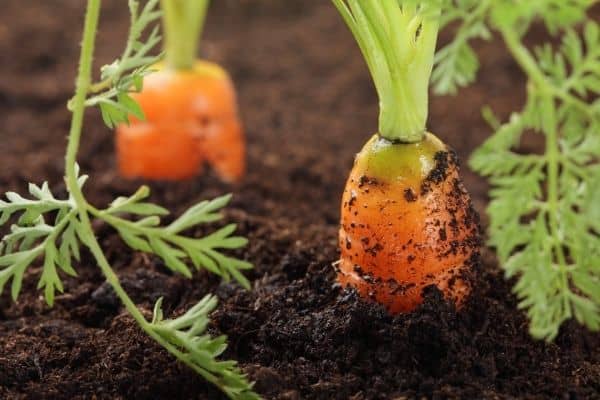


Recent Comments